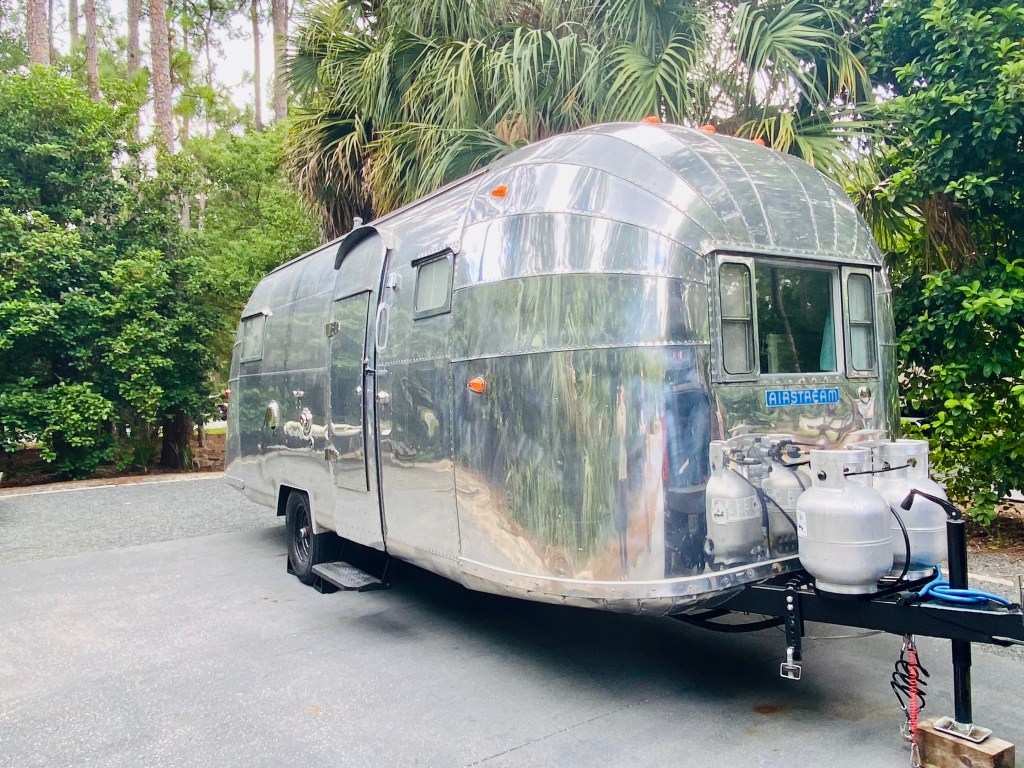
The restoration of our 1954 Airstream Safari. Uhhhh…this thing is going to take a while…. Actually it took 5 years to complete, but it is done.


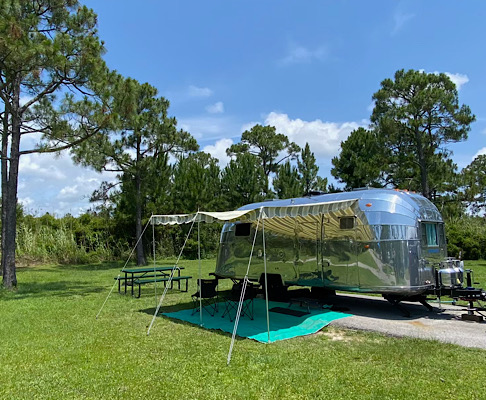
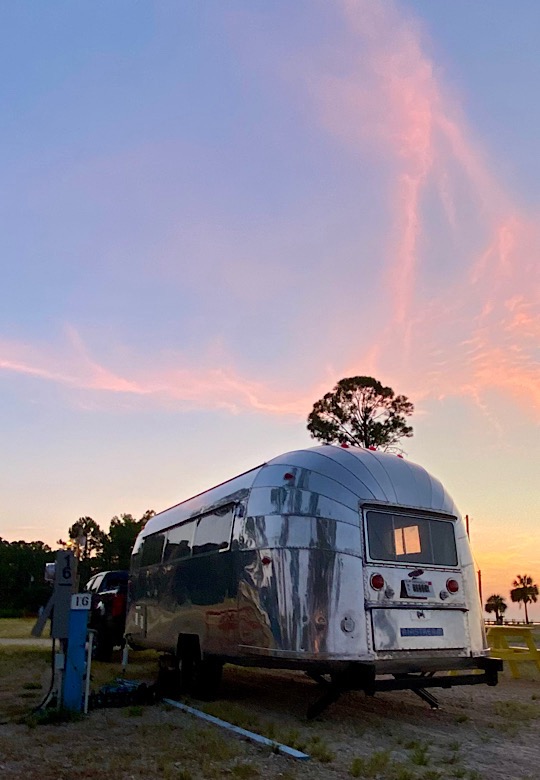
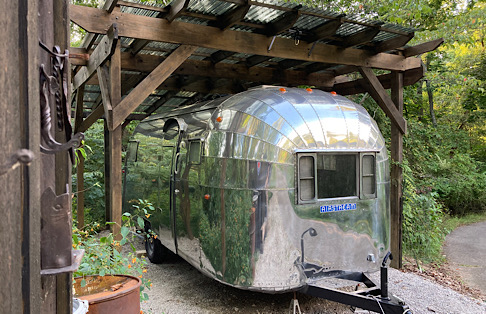
After 5 short years, the Airstream is complete. It made it’s first trip down to Carrabelle Florida and the Ho Hum RV park, a side trip down to Disney World, and eventually a stop at Gulf State Park for a well deserved vacation on the Gulf of Mexico…because all Airstreams love the beach. You can read below how we got to this point….Cheers.


So what is an ”Airstream restoration?” Well…it is where you try to convince thousands of tiny aluminum, large aluminum, wooden, and steel parts that arrive in many tiny boxes, large boxes, and even the occasional pallet from the likes of places such as Colin Hyde Trailer Restorations, Airparts Inc., Vintage Trailer Gaskets (yes, there is a place that just sells vintage trailer gaskets), Metals Supermarket, Vintage Trailer Supply (so many tiny boxes and parts from VTS), and local hardware stores to travel down the road at approximately the same speed….and in their spare time, you hope they work together with each other to keep out the rain. To do this, you need to listen to 16 years of podcasts from The Vintage Airstream podcast (with the silky smooth voices of Tim Shepard, Colin Hyde, and Rob Baker in the early years), learn how to weld, and use a variety of other skills developed over a lifetime of woodworking, auto repair, home renovation, and swearing…so much swearing. Then after only 2 to 4 years, it will be ready for its maiden voyage where you find out everything that is not quite correct. At that moment in time….you notice another one and say to yourself…”you know that first one I did was pretty fun, it really didn’t take that long or that much money, and I still have all of those speciality tools that I bought for the first one….” And so the world turns…..
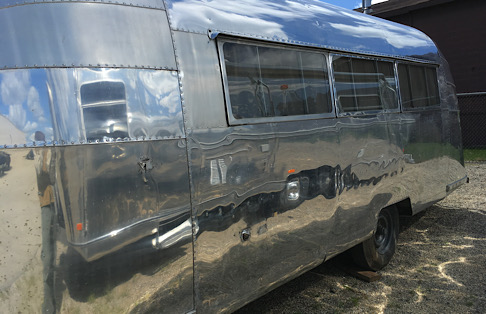
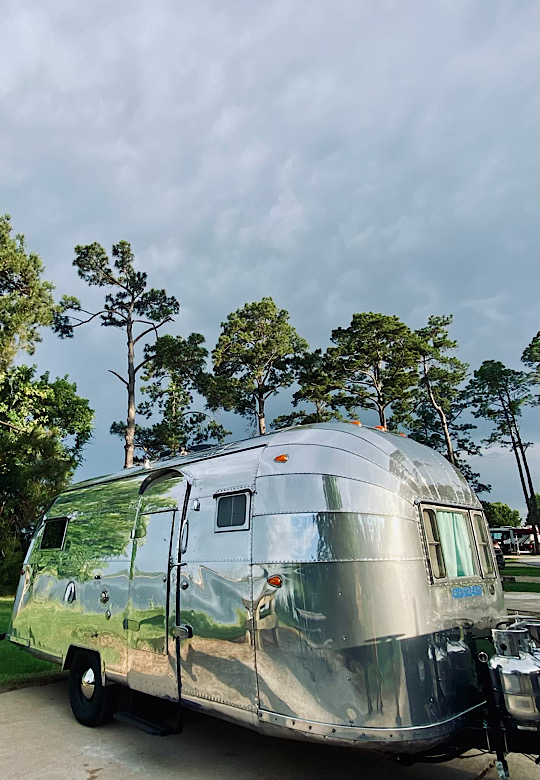
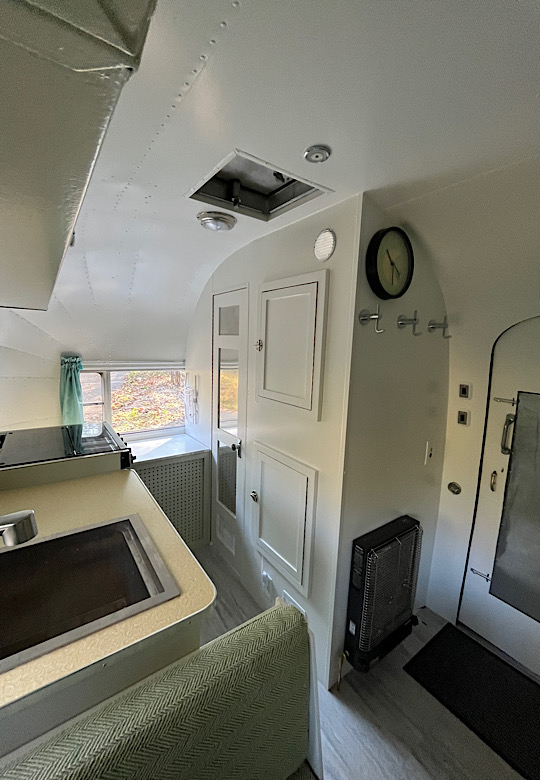
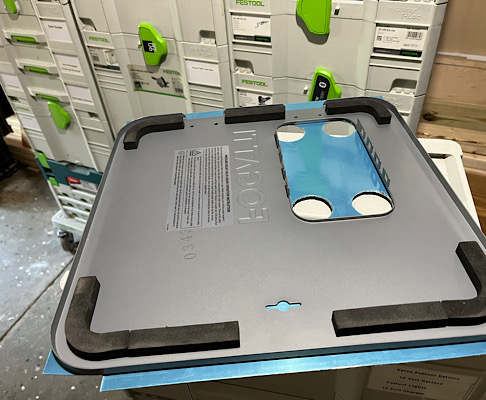
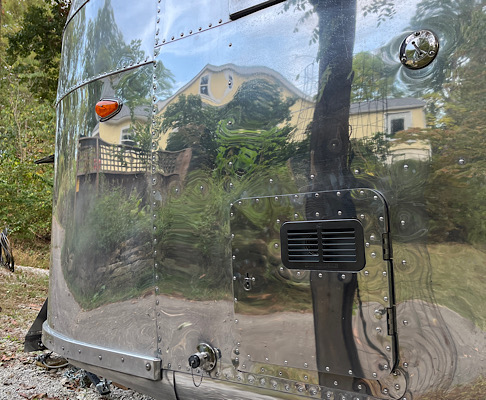
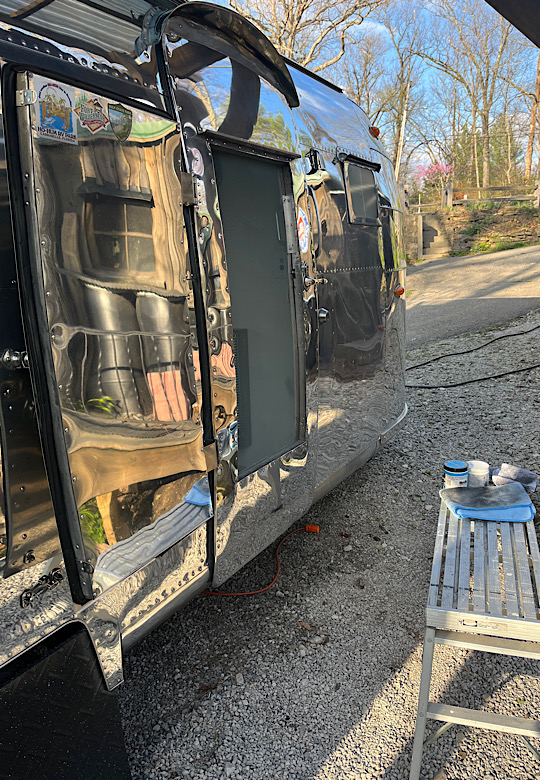
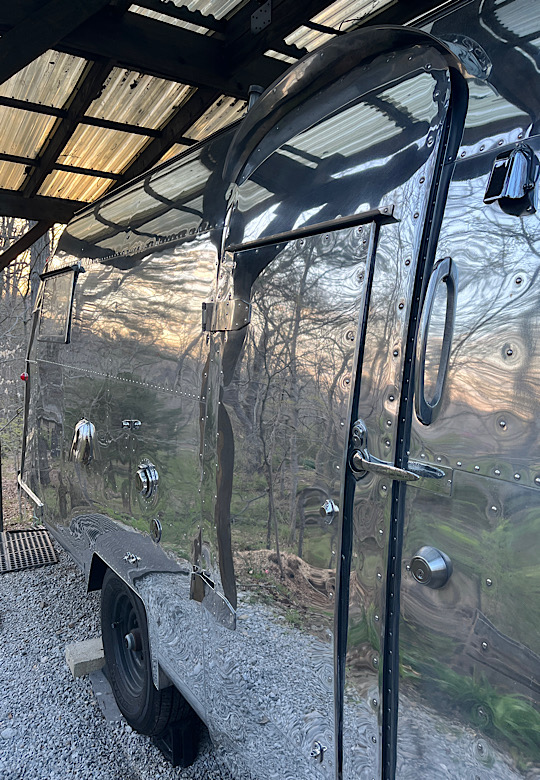
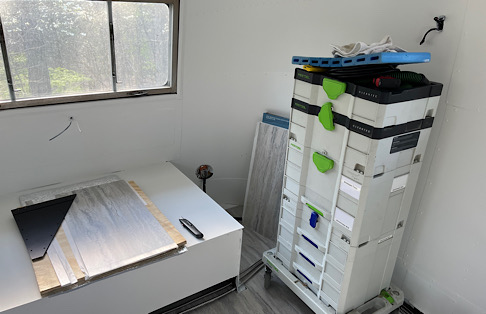
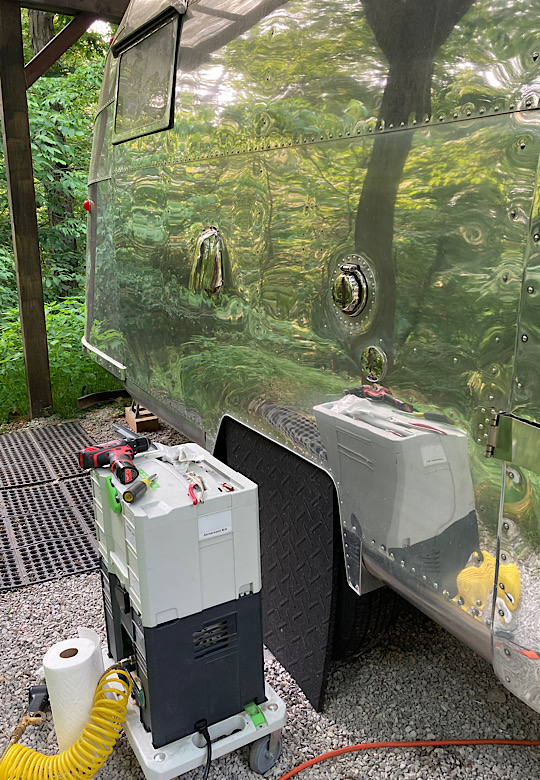
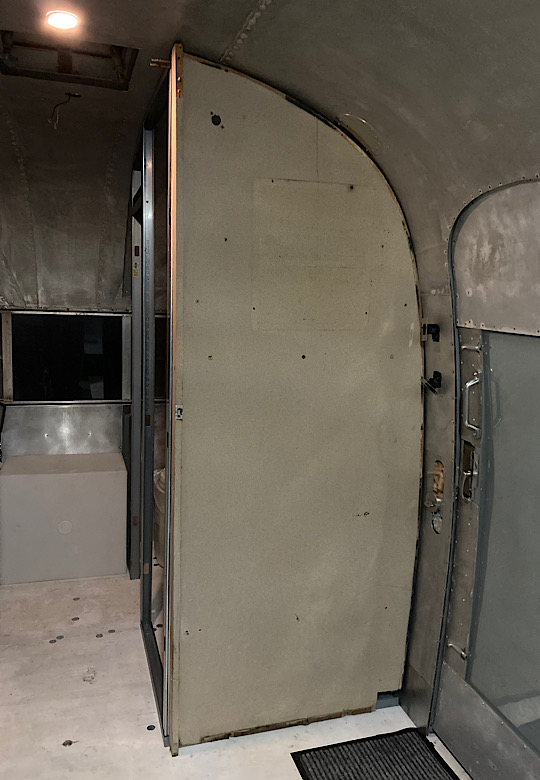
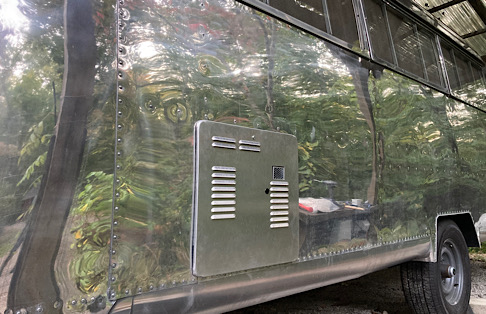
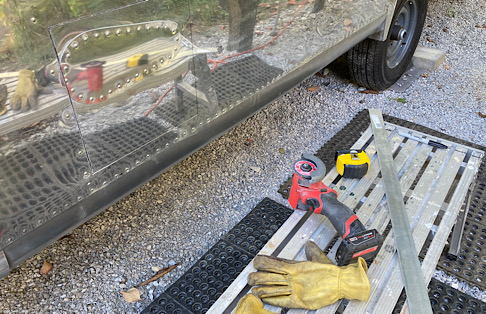
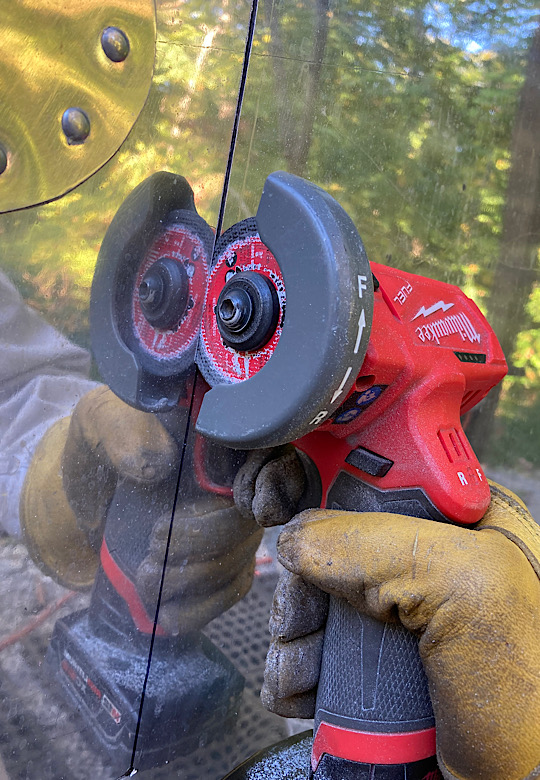
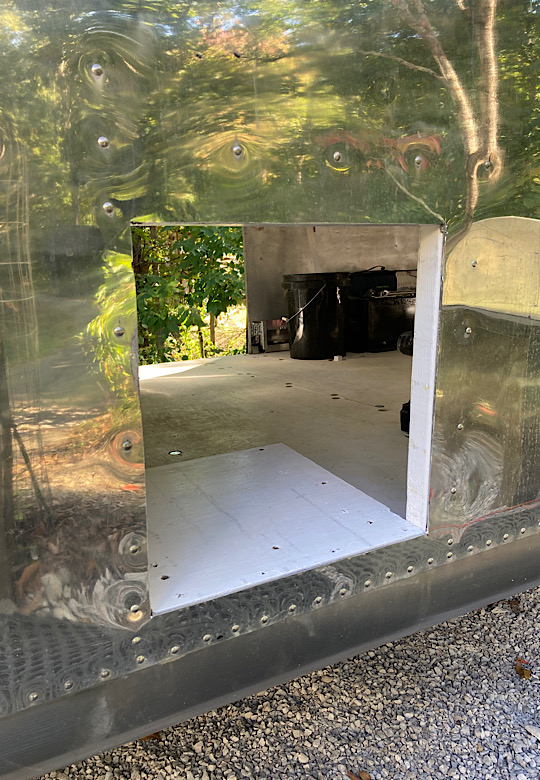
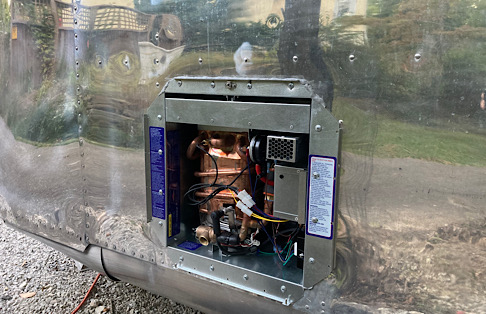
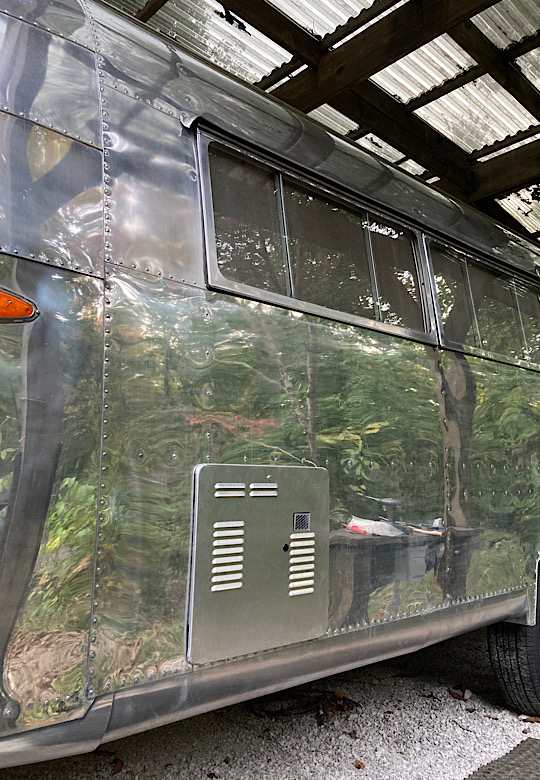
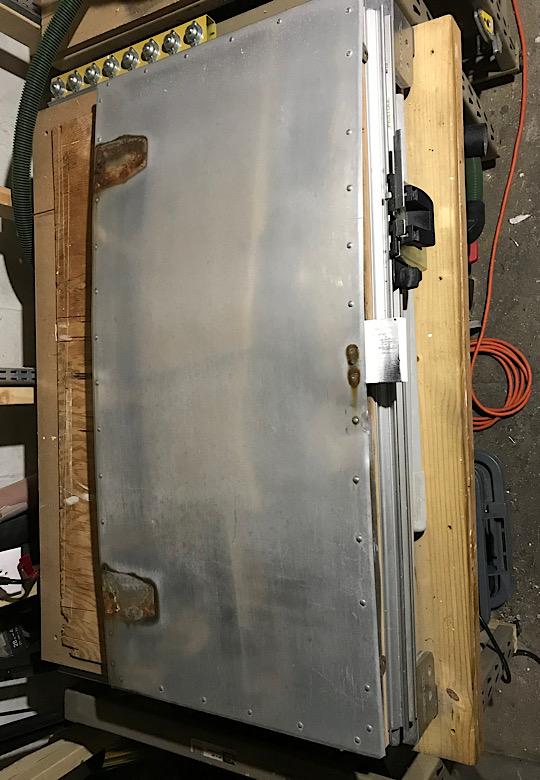
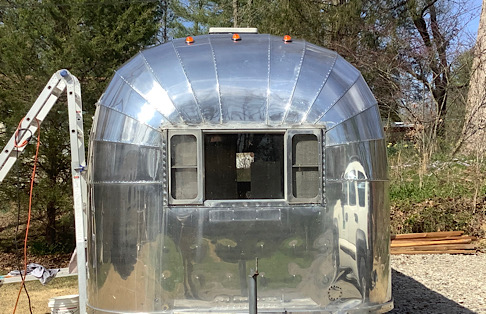
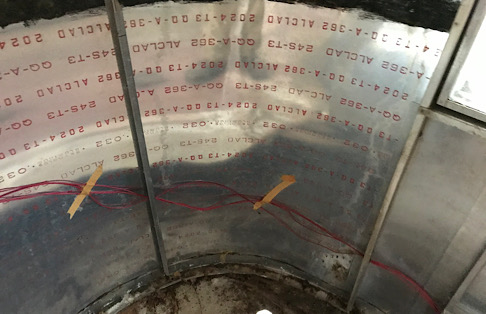
Well…the first water heater was a bust. It just would not consistently heat water like we wanted…scalding hot one minute and freezing cold the next. Not really what you would call a relaxing shower event. So, it was time for a change in September 2025. After looking at all the options that would fit in the tiny little space I had left for a water heater (my bad) we went with a Fogatti InstaShower Ultra. The driving reason was that I was pretty sure I could make a shiny aluminum skin to cover the gray door…it also seemed to get pretty good reviews, but we shall see. You may also notice some new window tint. Why you may ask? Because it was HOT 🥵 without it. Especially at the beach in the hottest part of the summer. Possibly not the smartest thing I have ever done, but what can you do…you can add window tint.
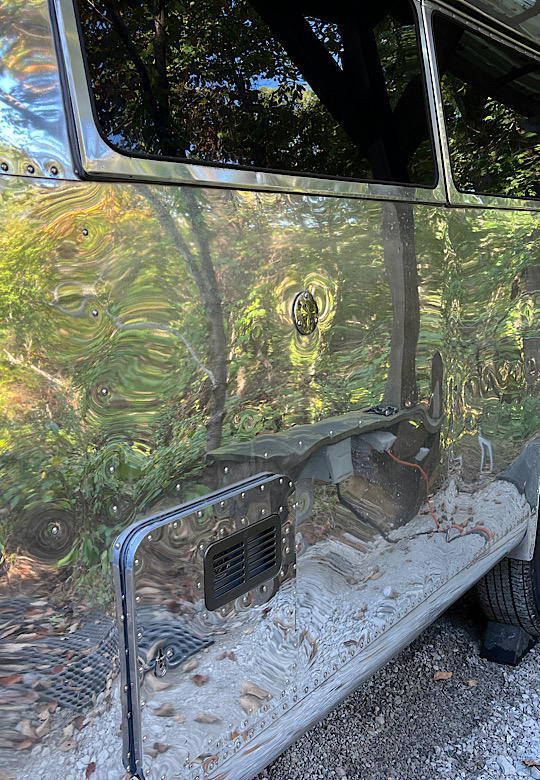


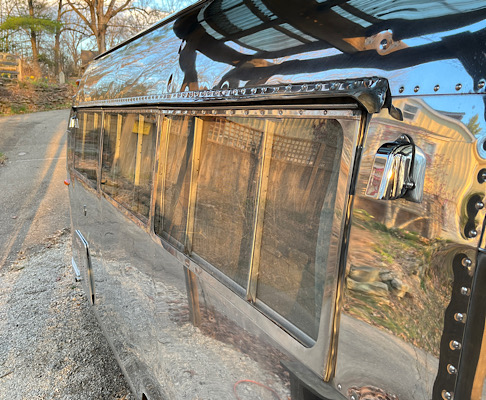
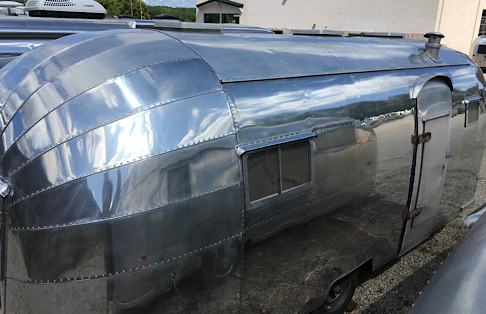
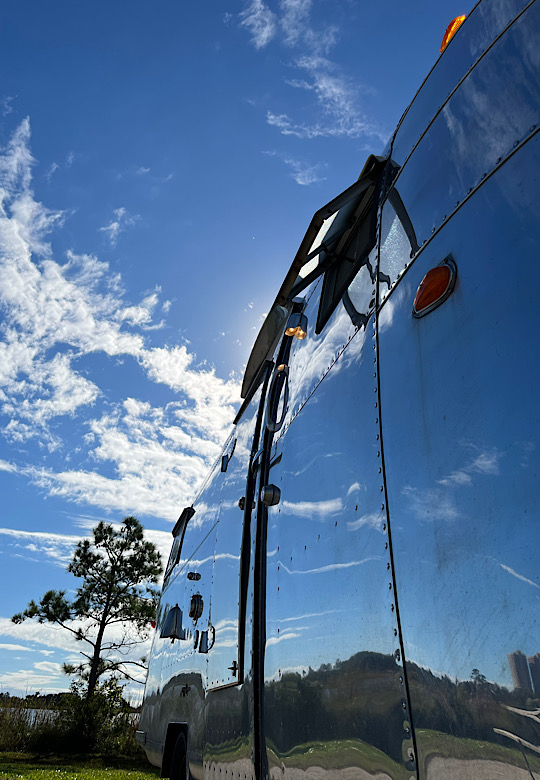
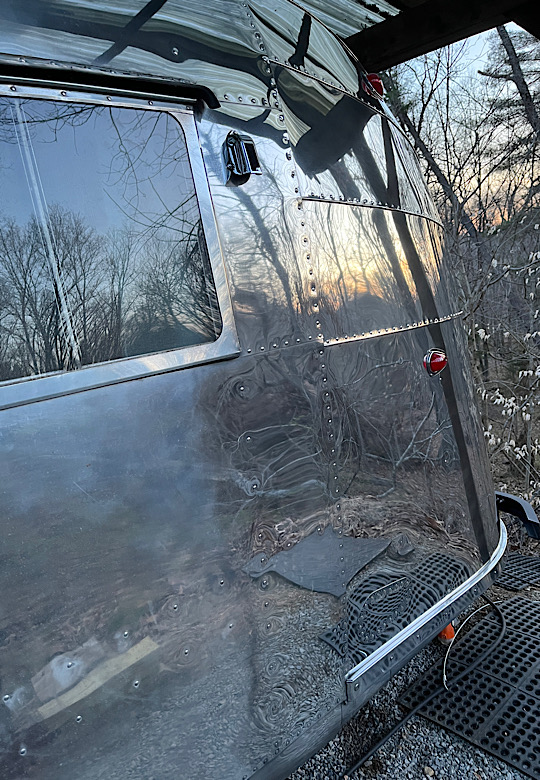
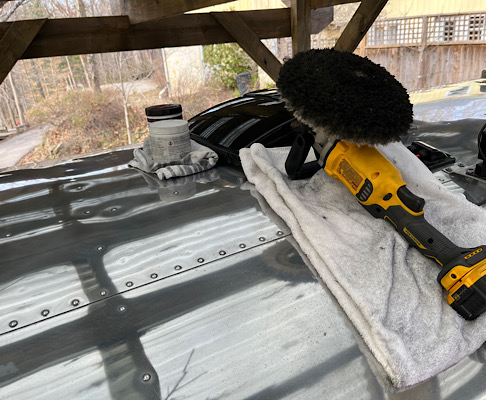
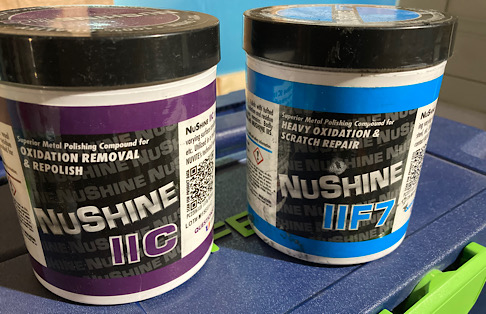
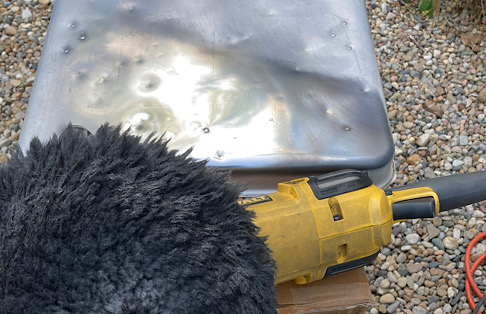
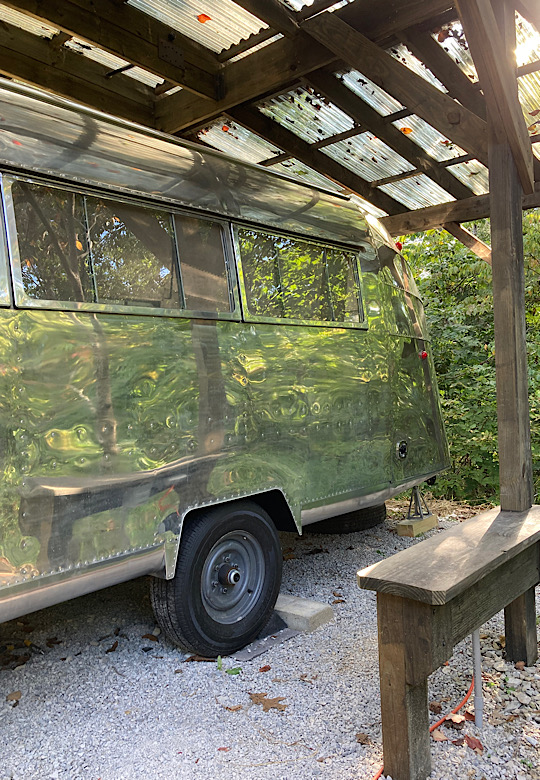
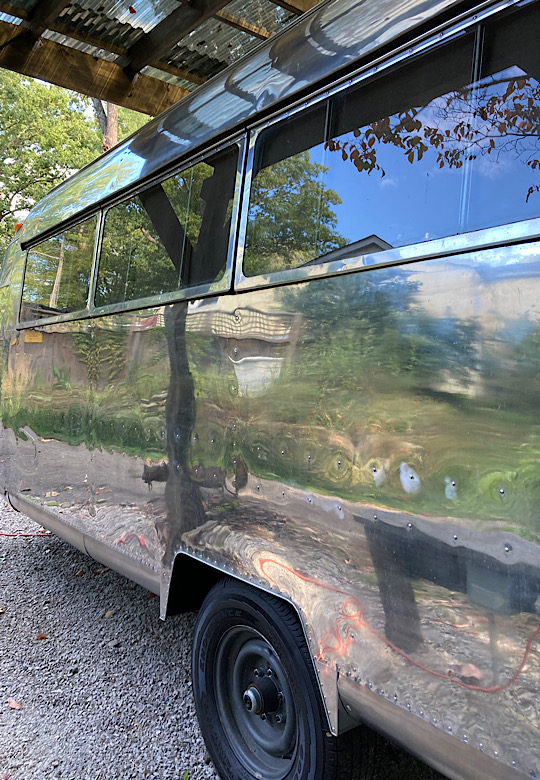
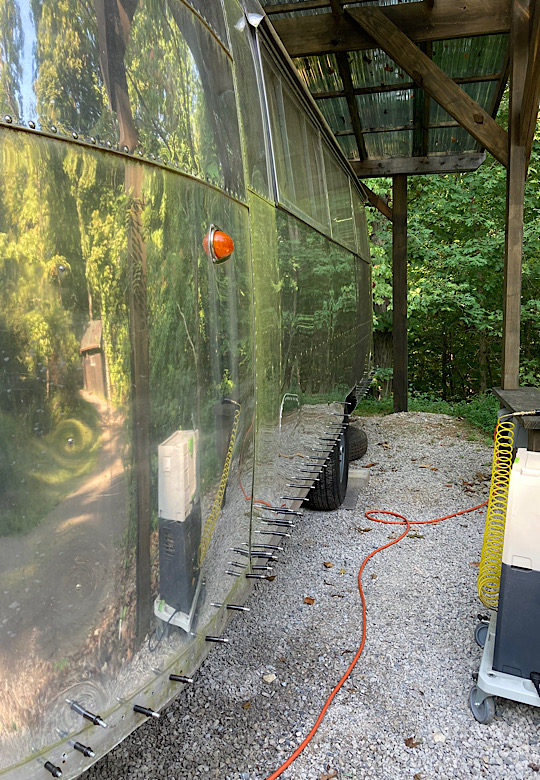
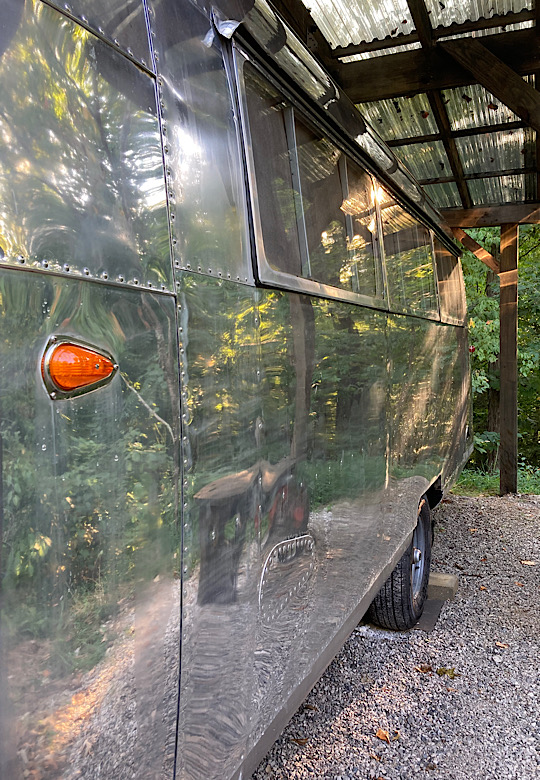
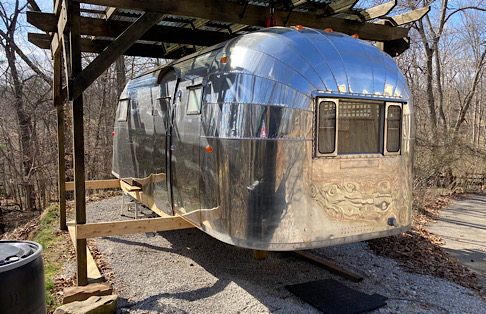
Just a wee bit of spring polishing getting ready for our summer adventures. Well…a lot more than just a wee bit. Polishing is a phenomenal amount of work, but it does make the Airstream look sooo shiny.


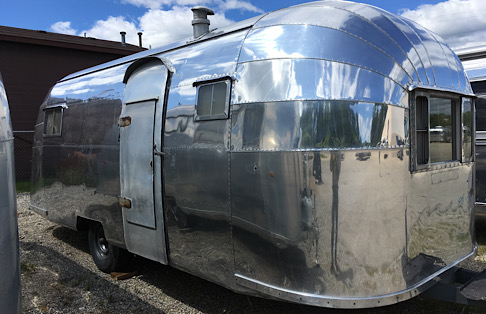
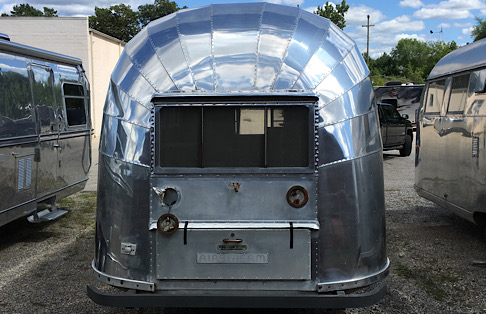
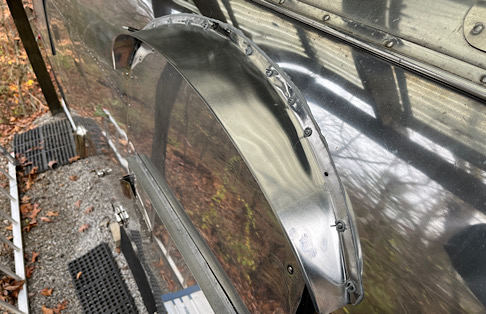
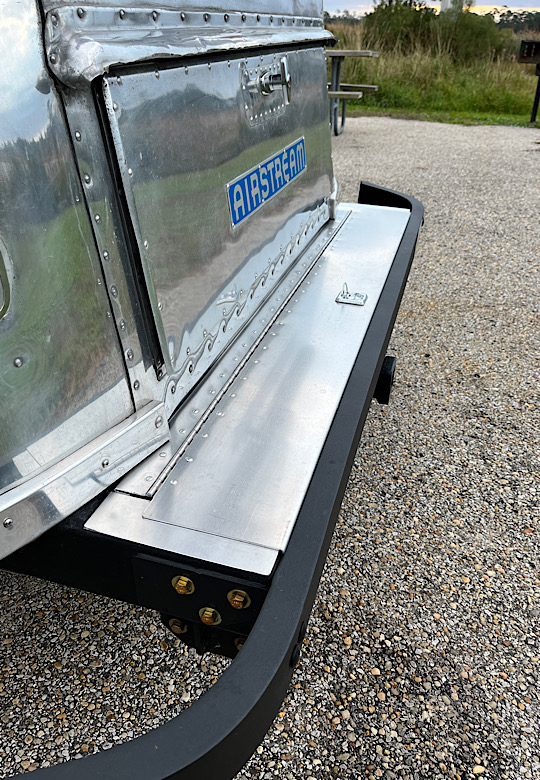
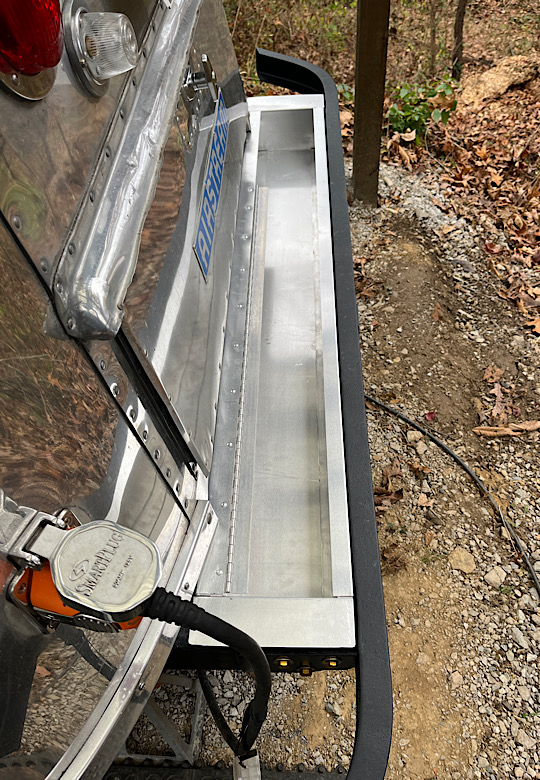
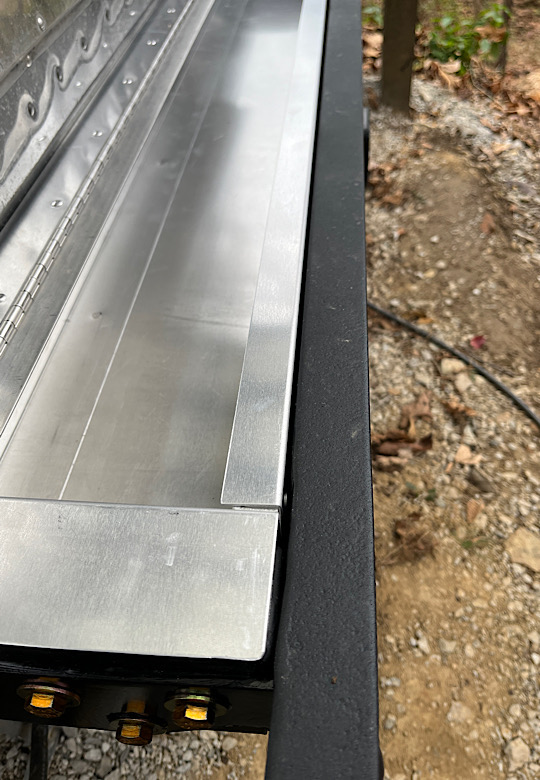
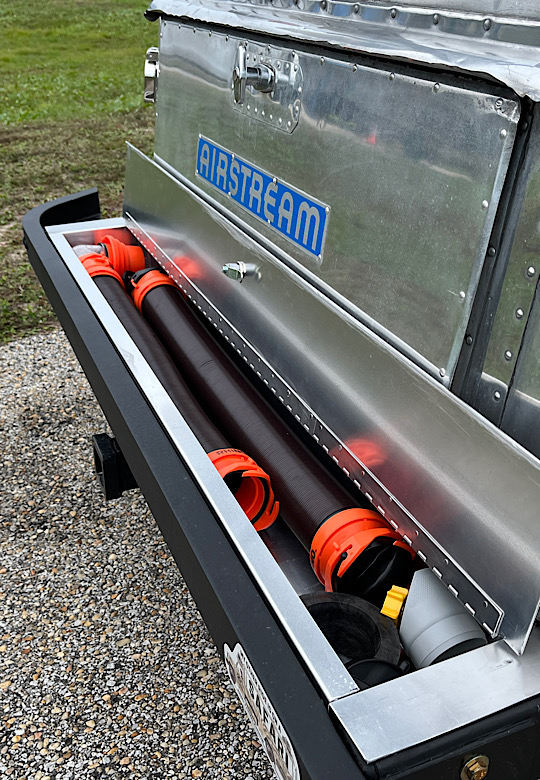
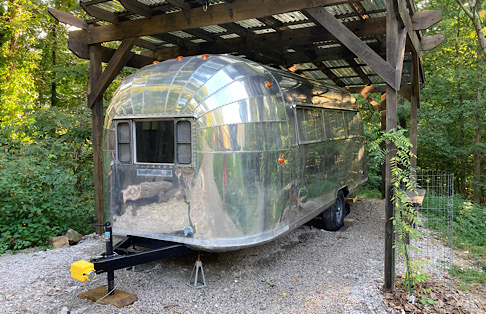
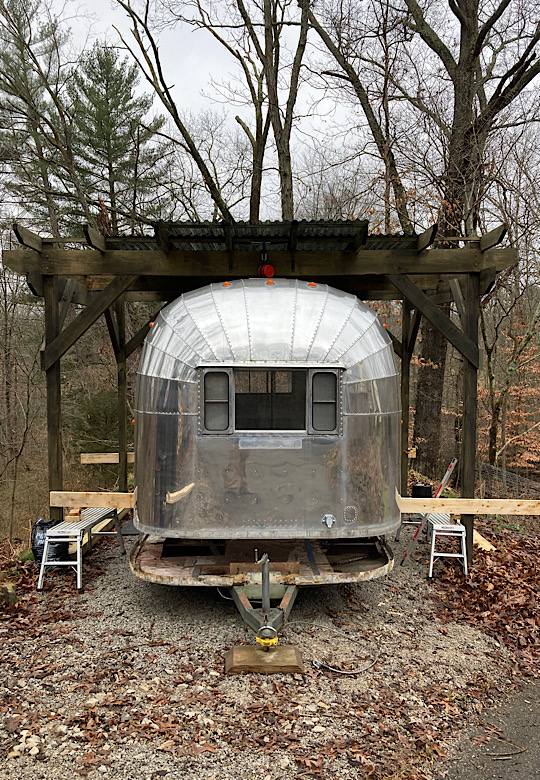
In October 2024 I finished up on a few remaining outside projects, like a new “eyebrow” over the door. The old one was a bit beat up and looked like Bert from Sesame Street. I also painted and put the bumper back on, and added an important and useful modern feature…a bumper trunk. Very useful as a convenient location to store the ubiquitous stinky slinky.


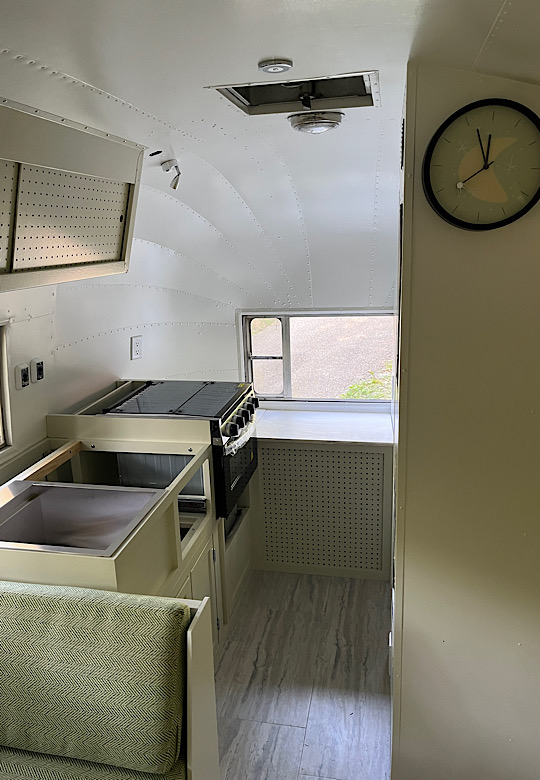
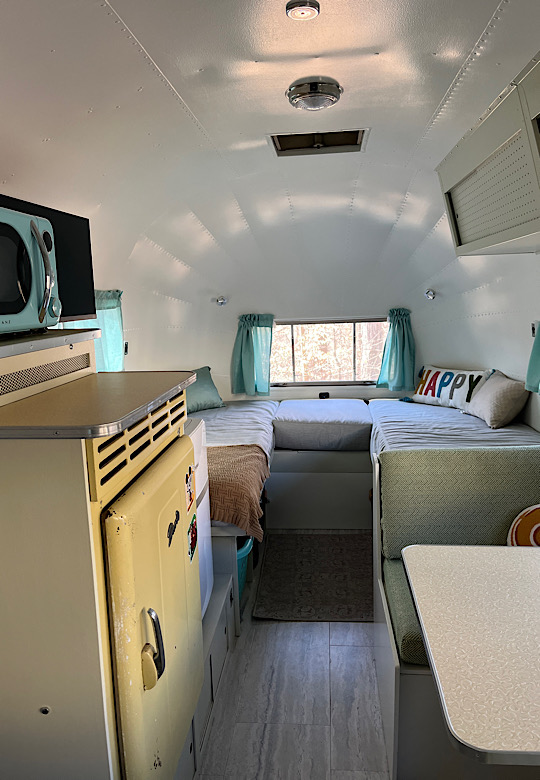
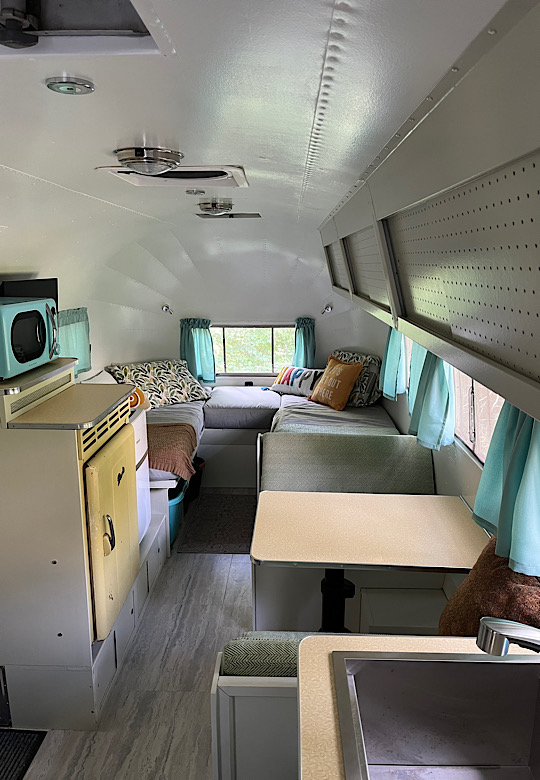
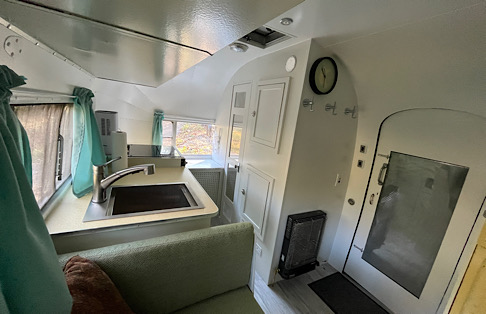
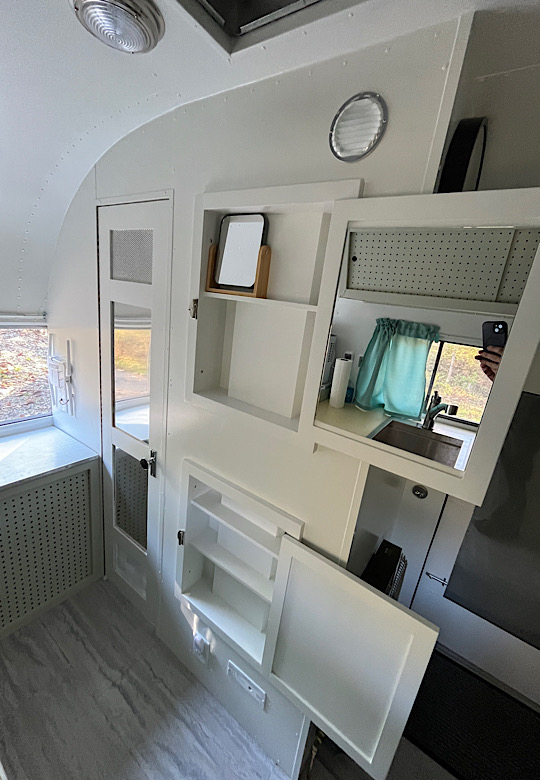
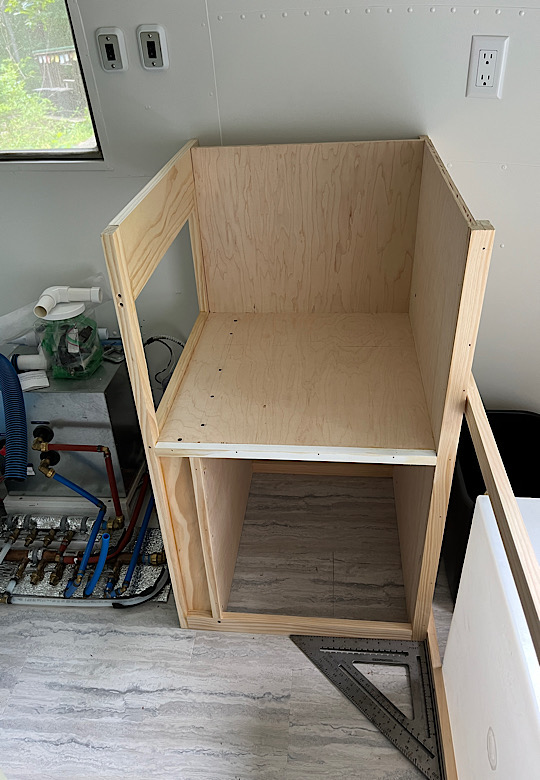
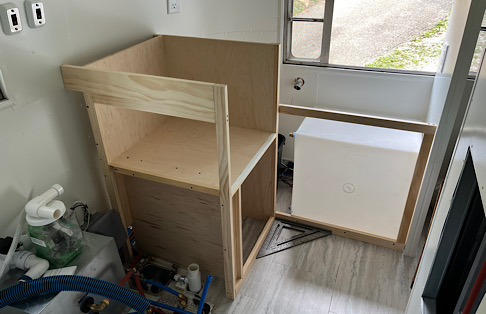
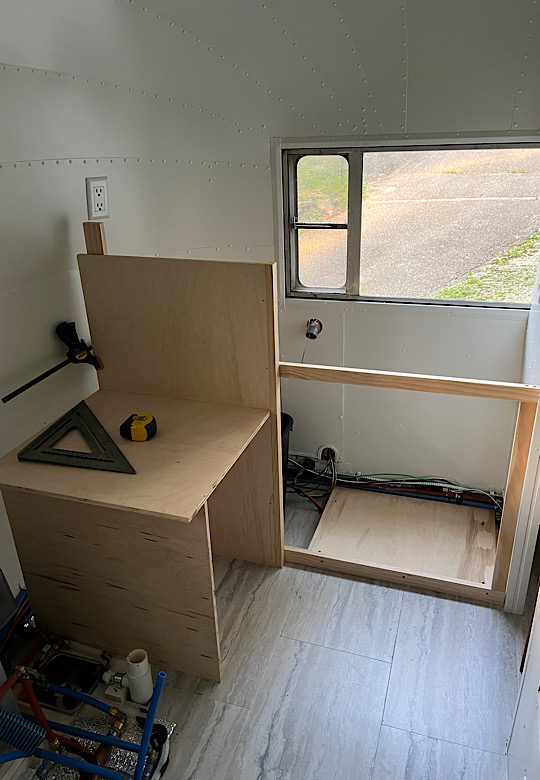
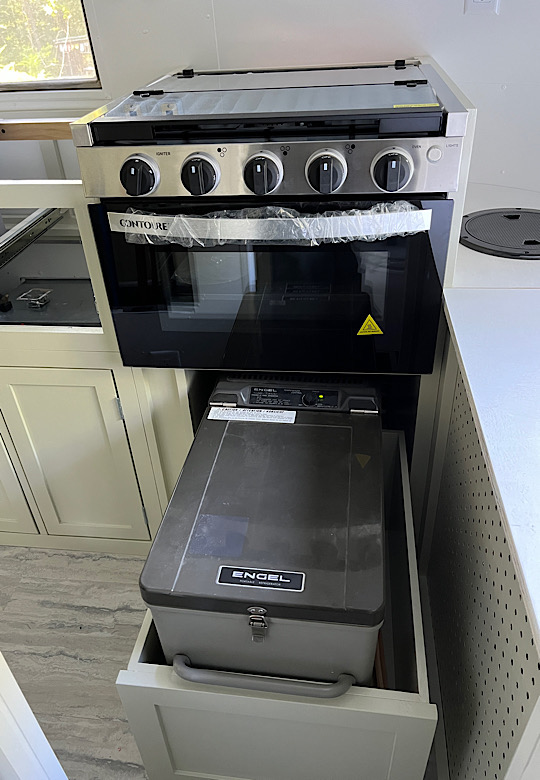
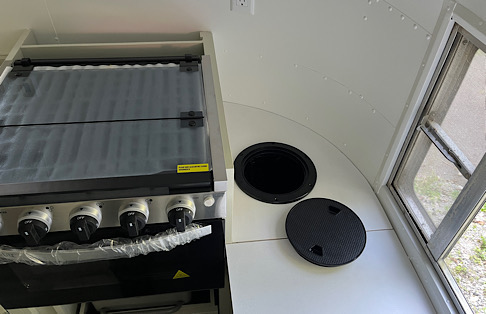
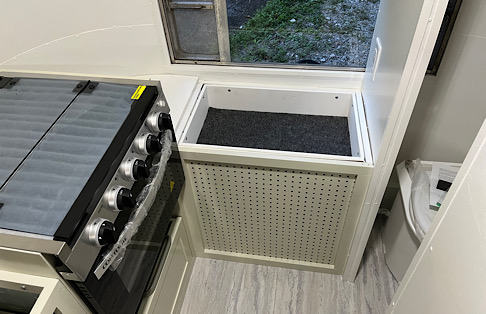
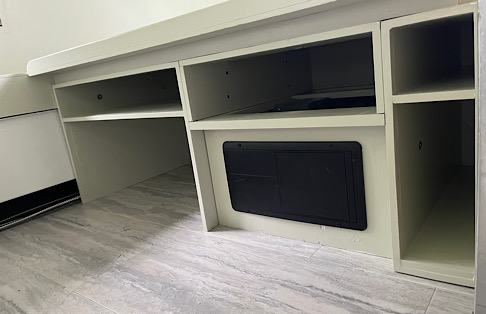
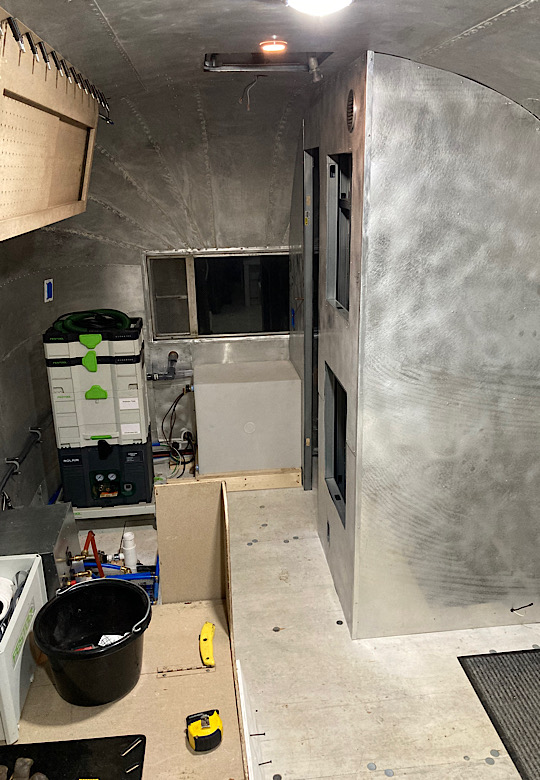
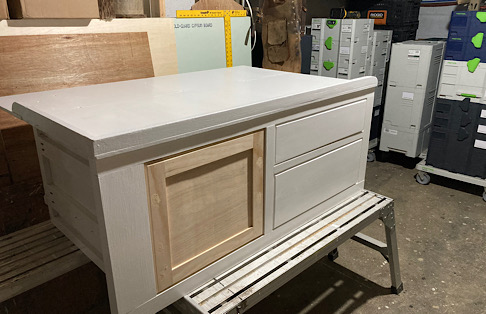
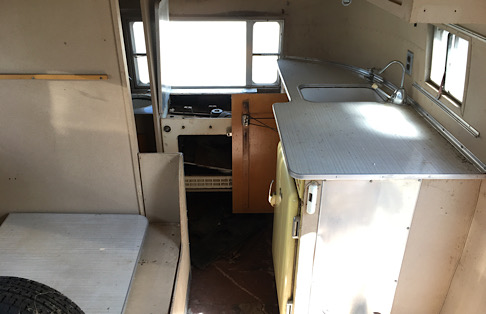
Now we are on to creating the kitchen. Everything has to be done from scratch…like a good pan of cornbread. I already have my stove, so I will size this cabinet for that particular unit and for an Engle freezer to go underneath in a drawer. I am designing this particular cabinet to be removed easily so that if the stove dies and we replace it with a cooktop and a bank of drawers, the conversion will be relatively simple. From what I have seen, the quality of RV appliances is pretty low, so I want to create the areas for the appliances so they can be swapped out easily. I also was able to use the dead space in the front corner for the trash can. I used a boat deck inspection hatch mounted on the surface of the countertop as a lid for the trash can.


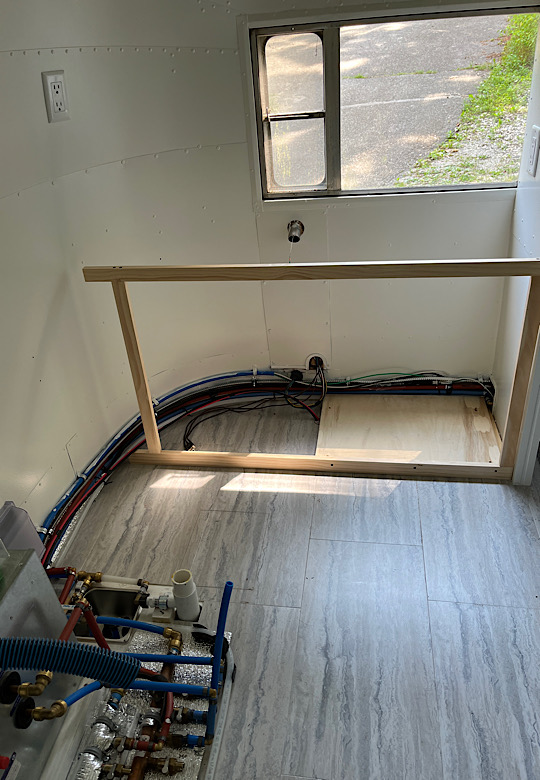

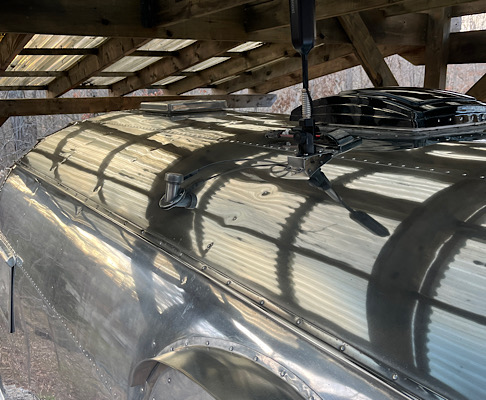
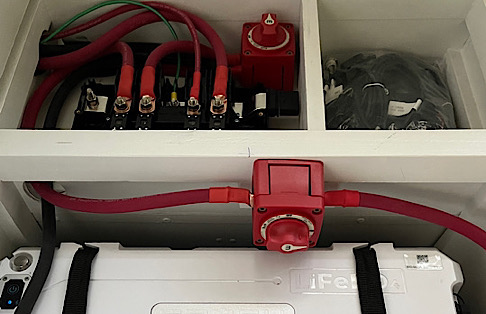
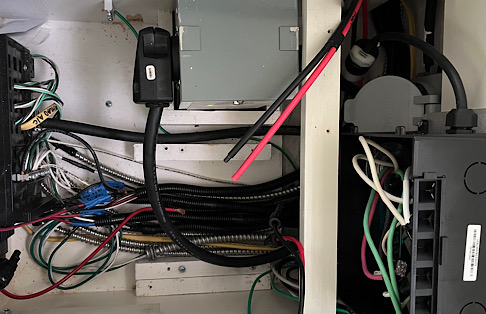
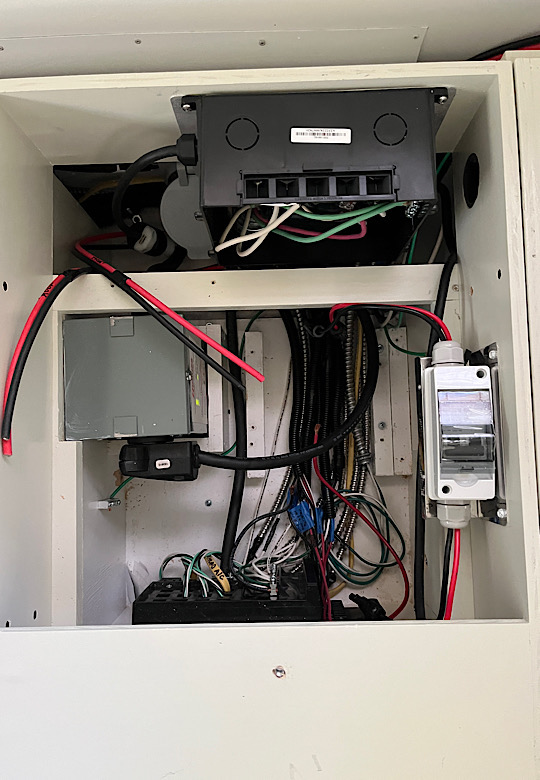
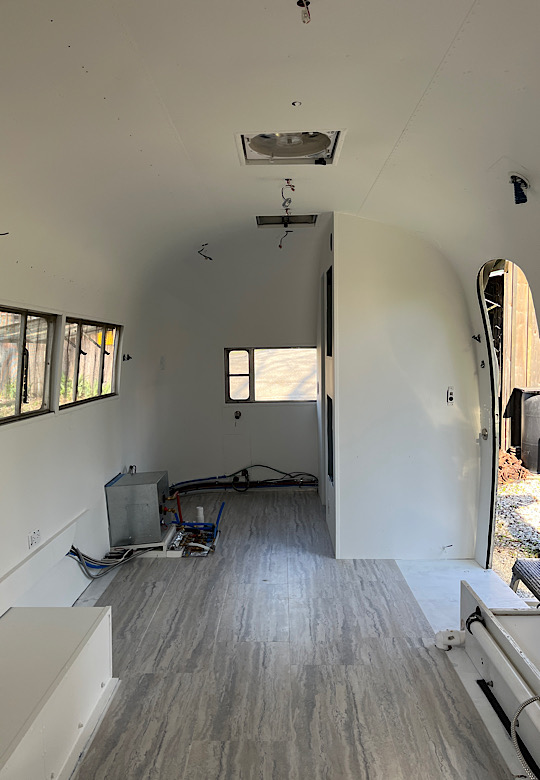
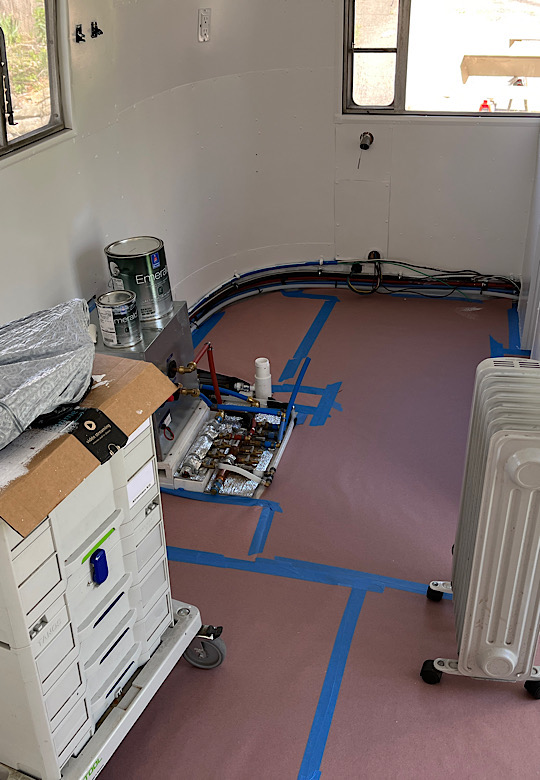
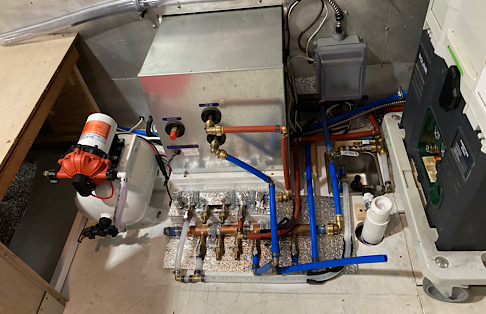
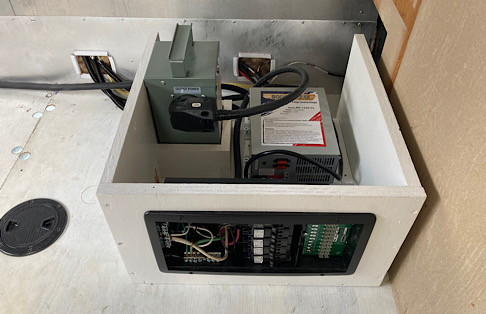
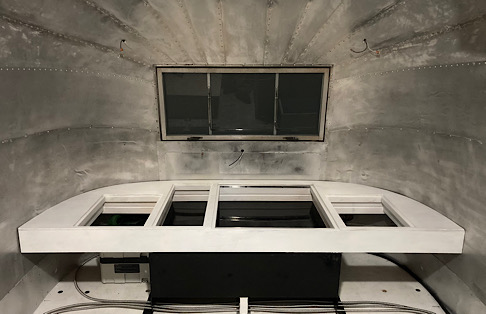
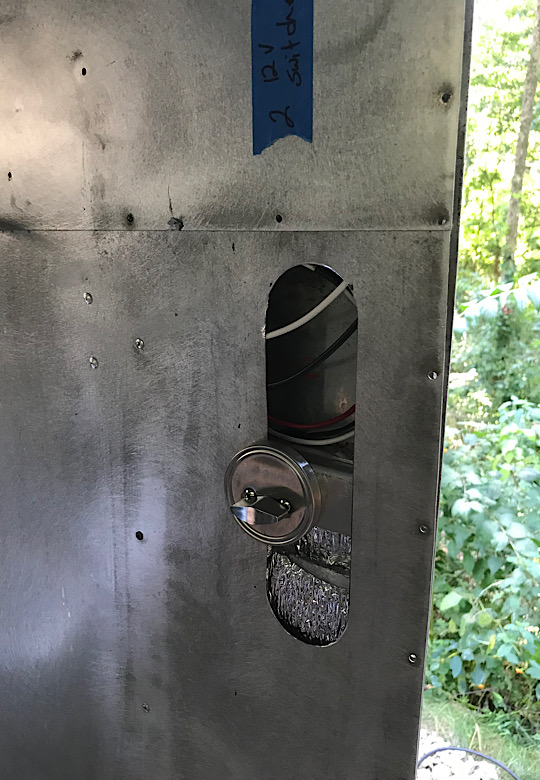
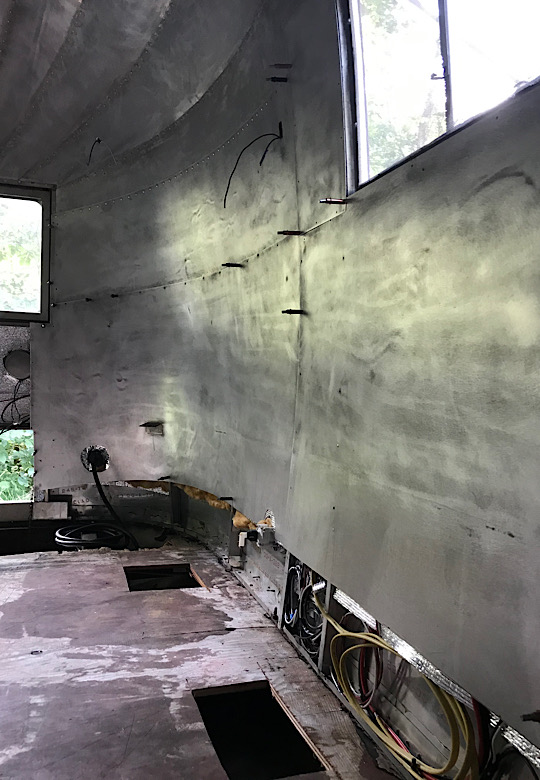
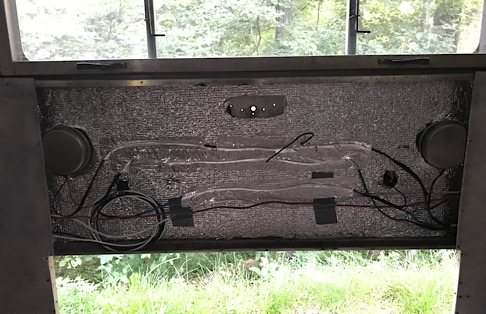
The next step here in June 2024 is getting the electrical finished. It had been hooked up well enough to provide light and power, but it was finally time to get both the 12 volt and 120 volt systems buttoned up…especially since those are located under the bunks and seats. And the solar….can not forget the solar. I have hookups on the roof for a permanent install as well as at the front of the Airstream for portable panels. There is also a switch to completely isolate the battery if desired as well as a second switch that will allow the camper to use 12 volt from the converter even when the battery is disconnected.


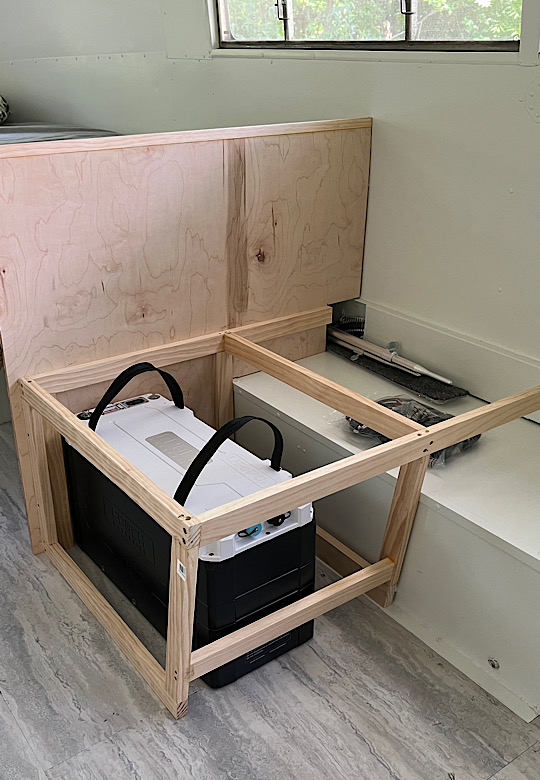
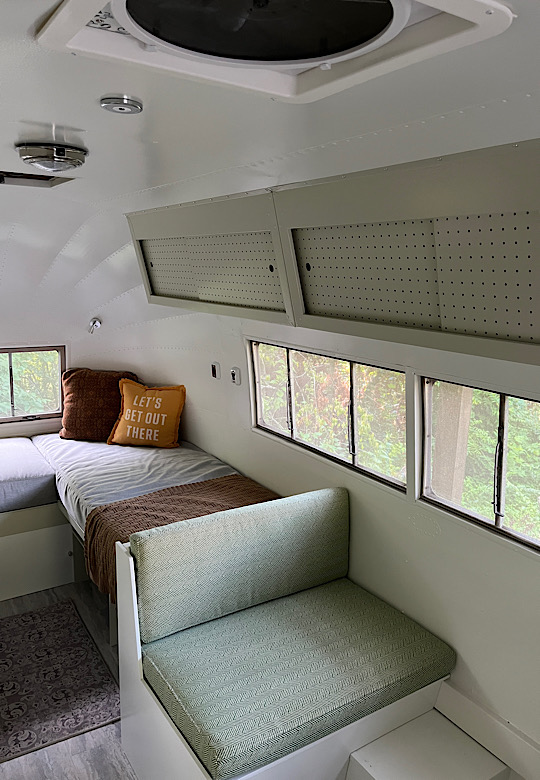
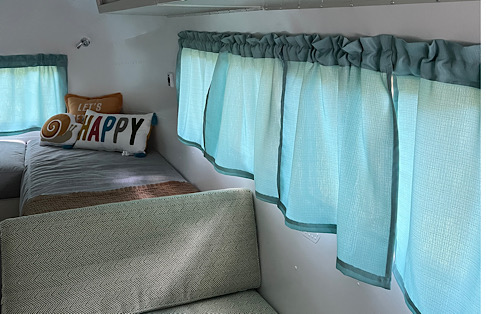

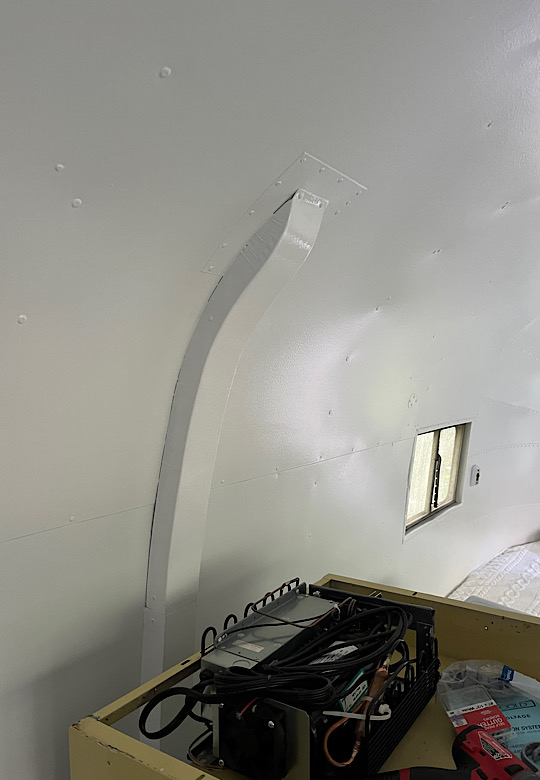
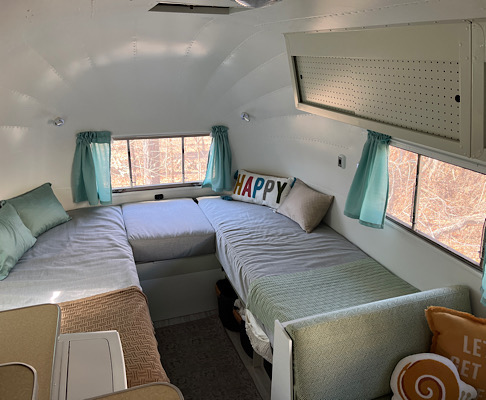
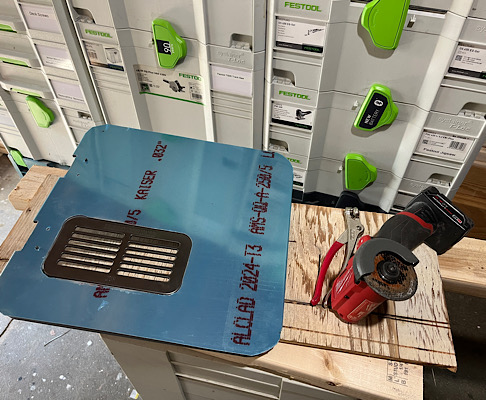
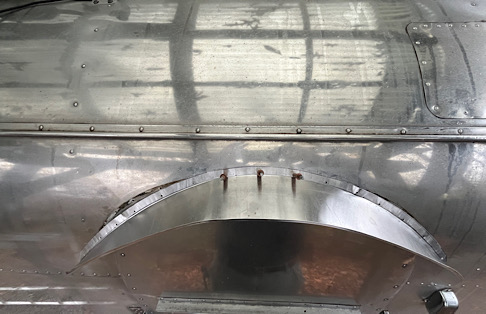
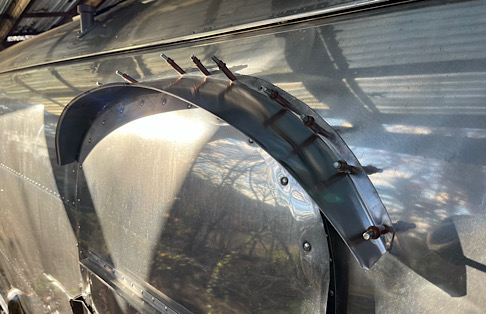
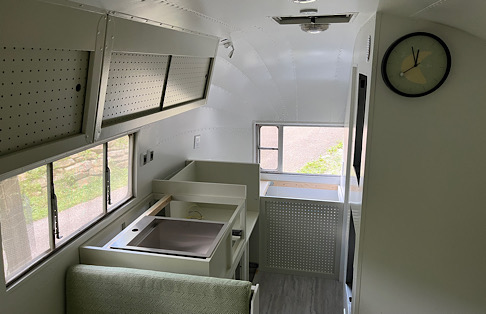
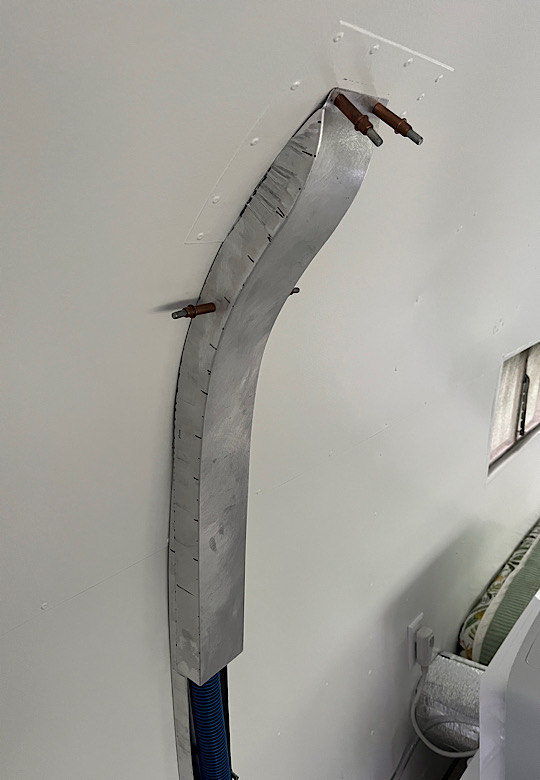
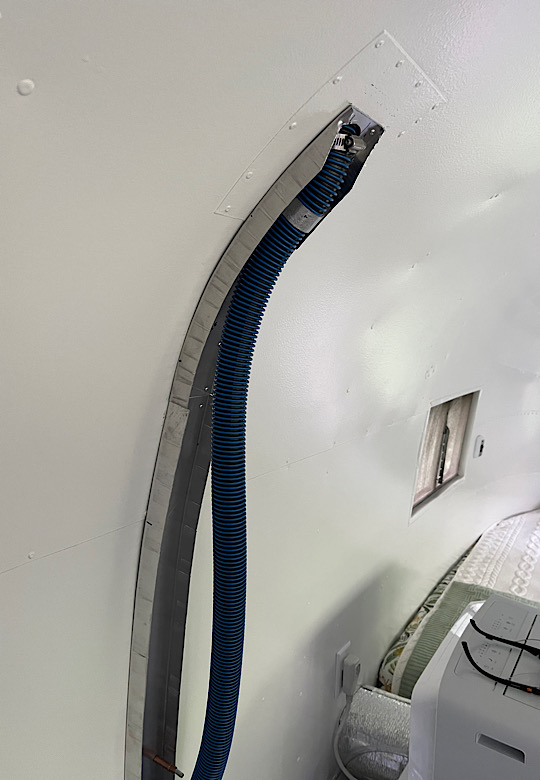
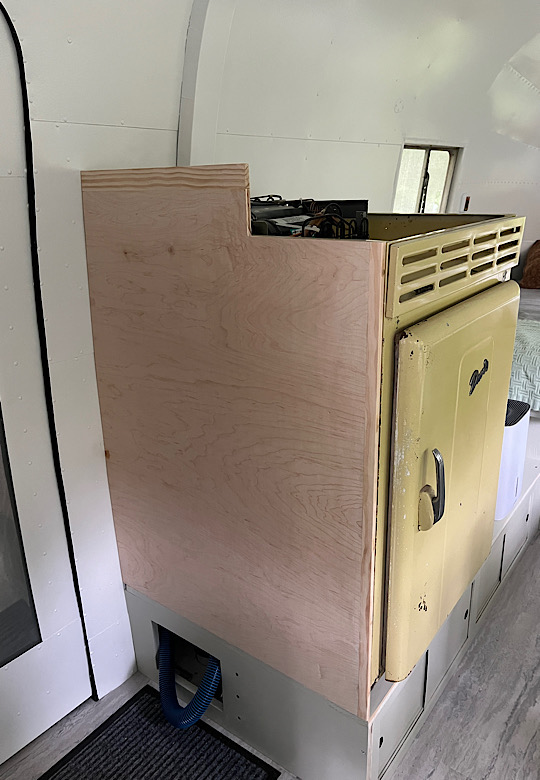
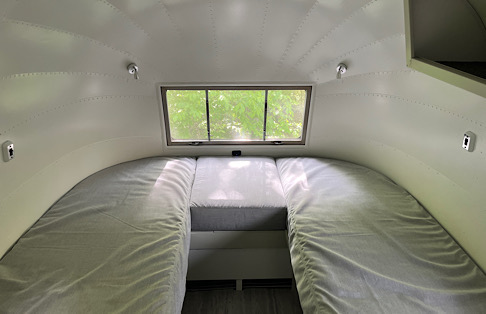
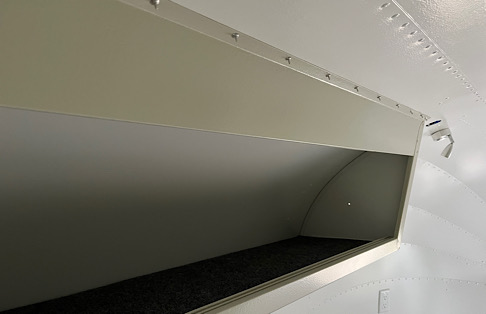
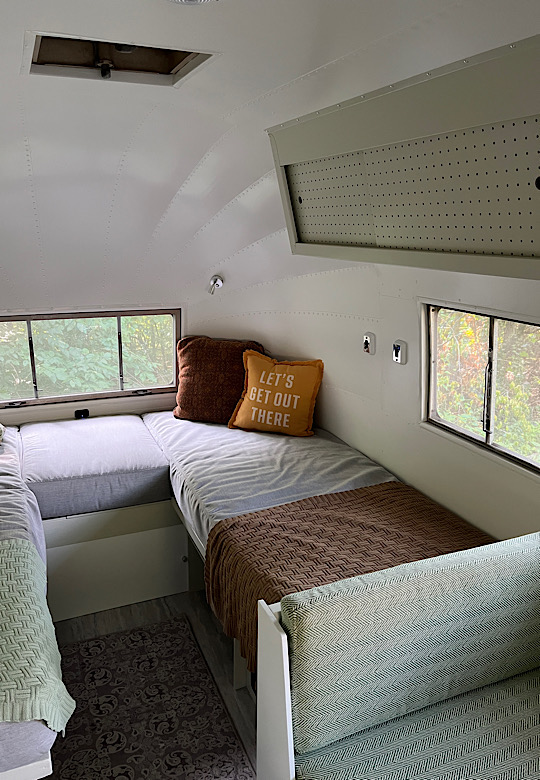
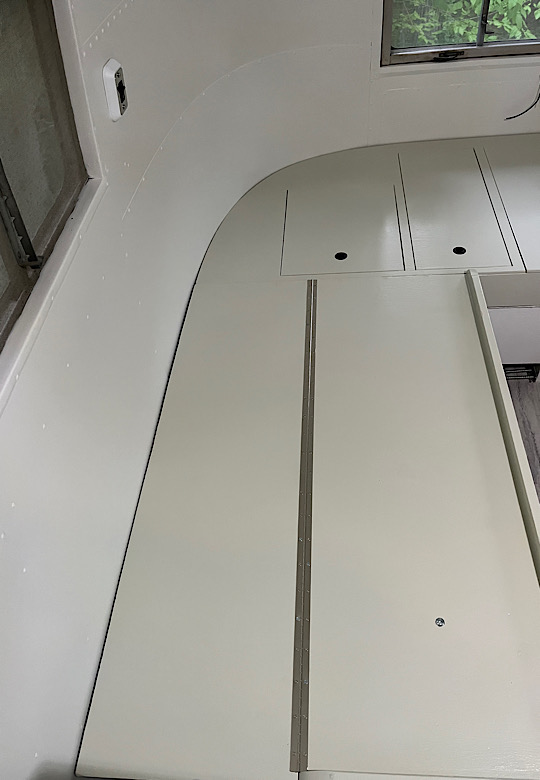
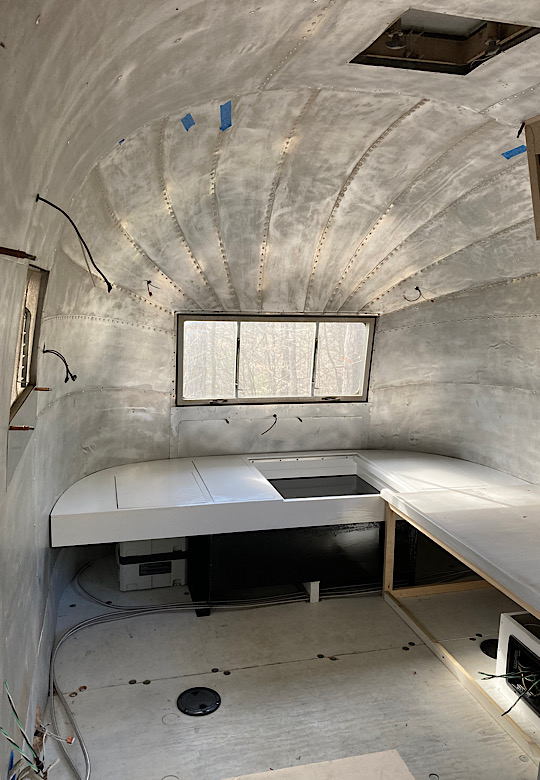
Now the sleep section is pretty much completed, I need to get the fridge and air conditioner unit installed. Above the fridge is where the vent hose is for the gray tanks. I used a flexible vacuum hose to minimize space and created this cover to let it blend into the wall. It was a bit more work than expected, but worth it in the end. Most vent pipe are put into floor to ceiling cabinets or closets, but this leaves my options open. The fridge is the original 1954 refrigerator, but I have removed all of the old guts and installed a new Norcold conversion unit so that it will run off of 12 volt and 110. The batteries, fridge, air conditioner, and one of the water tanks are also sitting right over the axles, so hopefully that will help with how the Safari tows.

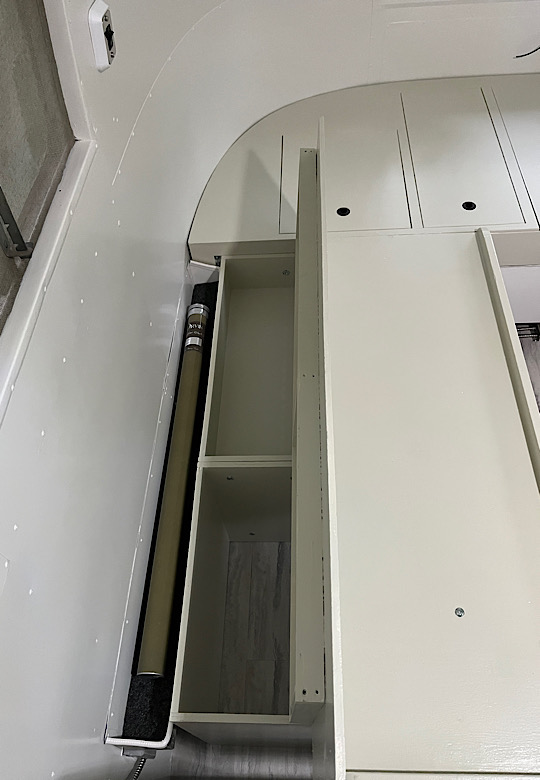
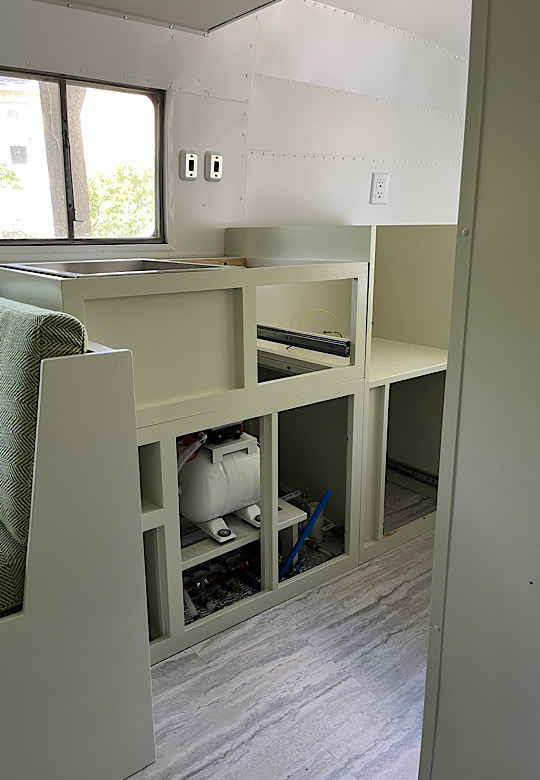
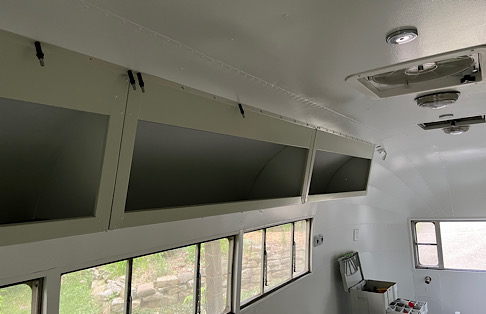
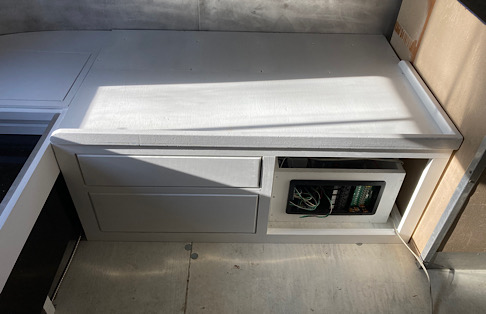
Now that the walls have dried and cured, I can turn back to installing the furniture. I am working on trying to make it as strong and light as possible. I am also working to make each section where it can be removed easily to work on wiring, change out a module to something different, or just to give me something to do when I get this thing done. I am also working to maximize the storage, like with this compartment for fly rods.


It is April 2024, actually it is Eclipse Day, here in sunny southern Indiana and it is finally paint day…..well, it is sanding day, then clean with degreaser day, then epoxy primer day, then wait 5 days day, then sand day again, then degreaser and clean day again, then primer day, then sanding day (again…that one seems to come around a lot), then….of course….cleaning and degreasing day, then caulk day…can’t forget caulk day, then touch up primer day, then paint day! Whew, that was a lot of work….but making paint stick to aluminum is no joke. You have to make sure you have good adhesion at every step. Oh…and moving day…how could I forget moving day. Everything that was not bolted down really good had to come back out. Once the paint is done, then it is on to the flooring.

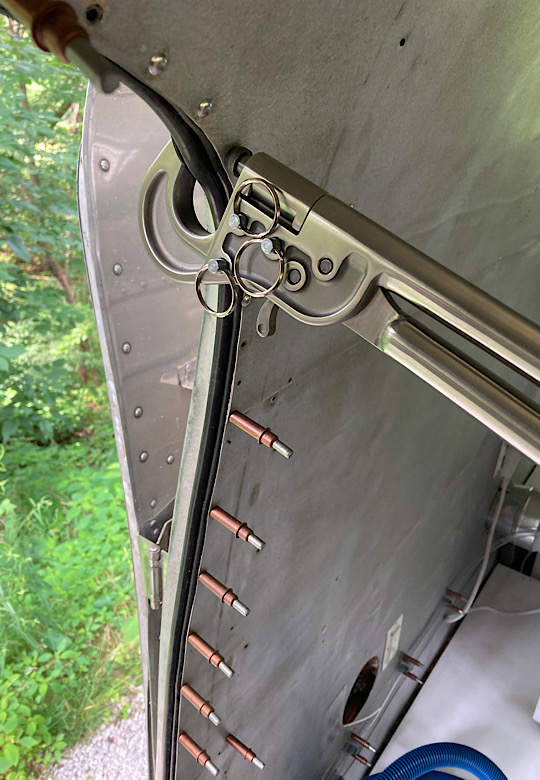
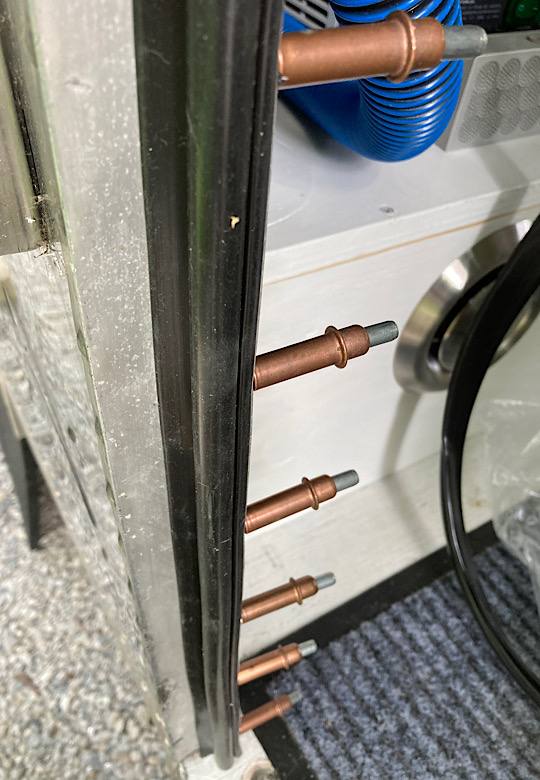
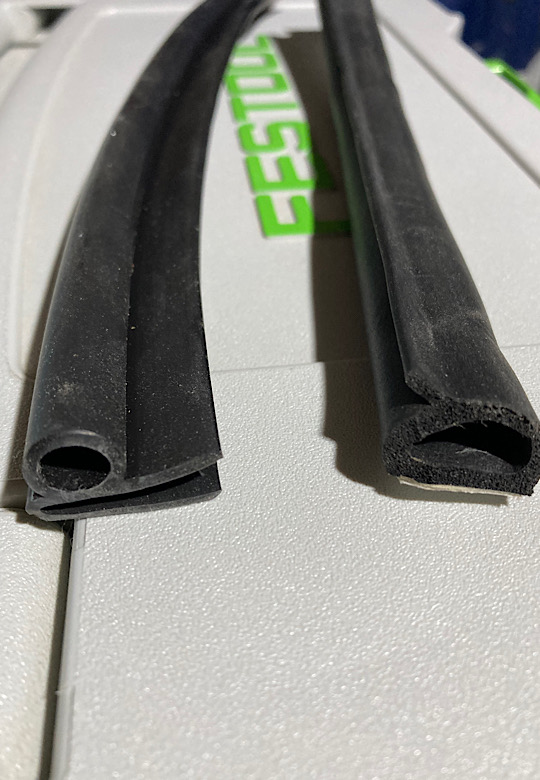
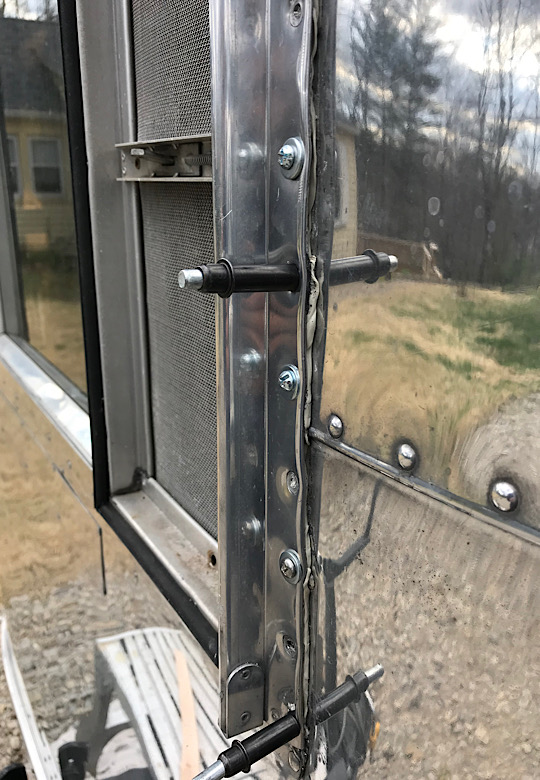
The next step in the process here in August 2023 is replacing the door seals. The entry door has two seals. The outer seal is a self-adhesive foam seal with a small flange that is the first defense against water and dust. The inner seal is a silicone seal with a flange that fits between the skin of the wall and the frame of the door. The bulb compresses against the door as it closes. The inner seal is attached with solid rivets that are installed with this handy rivet squeeze tool. It can be riveted on with the bucking bar and rivet gun, but this tool is far more efficient. Both seals are required for a water and dust proof door that is free from wind and the driving rain…well, resistant to large pieces of dirt, rocks, and light mist. Both are available from our friends at VintageTrailerSupply.com.


Just a few random projects in June getting the Airstream interior ready for painting…and Adventure! Some of these projects include putting up walls, installing the fresh water tanks, installing the water distribution system, finishing the electrical, a spare tire carrier, a bit of polishing, and creating a system that is easy to drain. Of course all of this stuff has to come back out for painting. Well, not the walls….the walls will stay in. It would defeat the entire purpose if I took the walls back out.


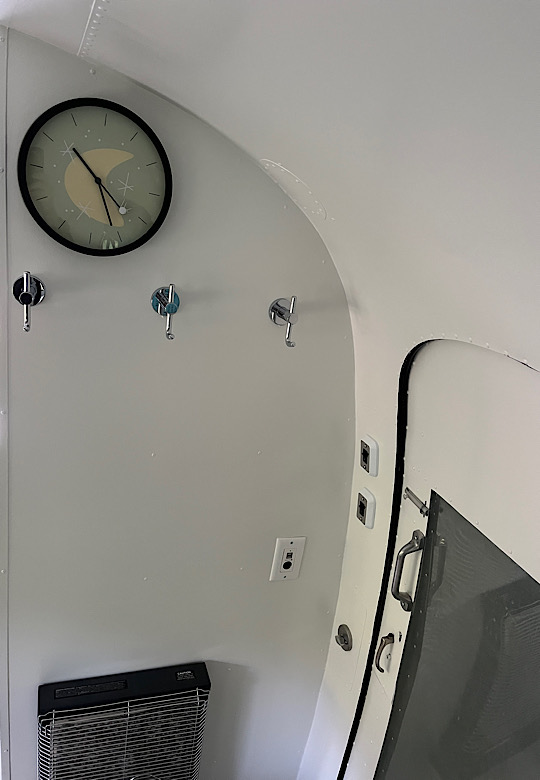
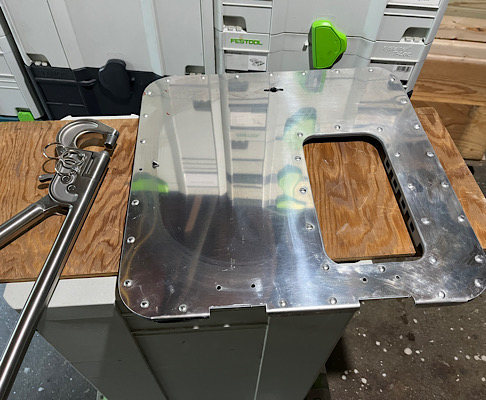
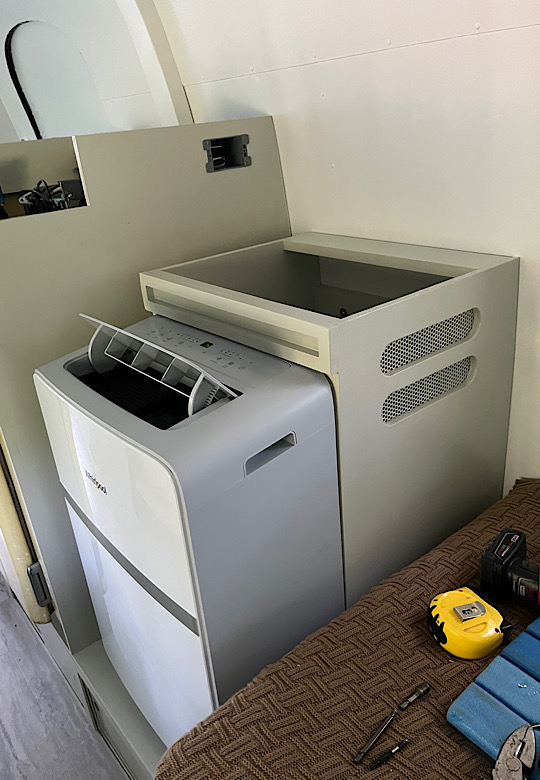
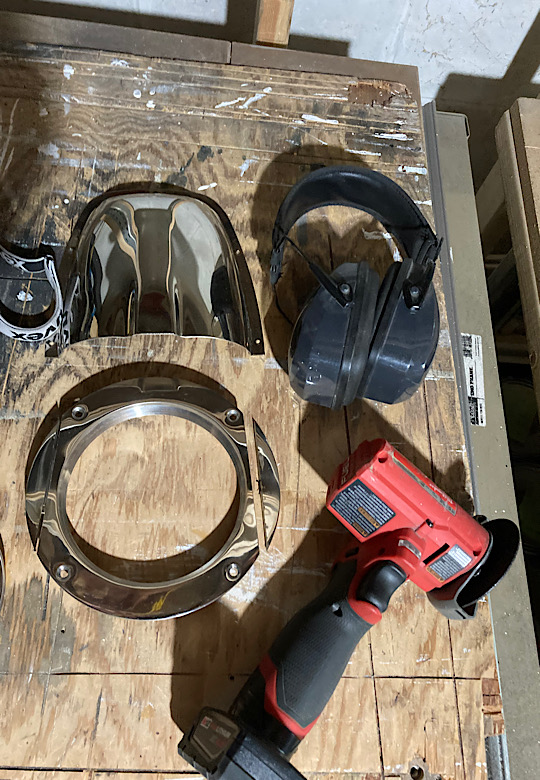
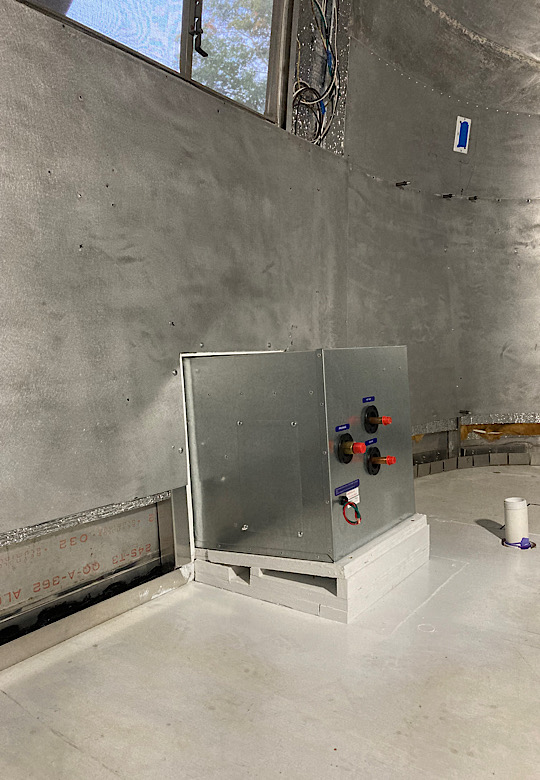
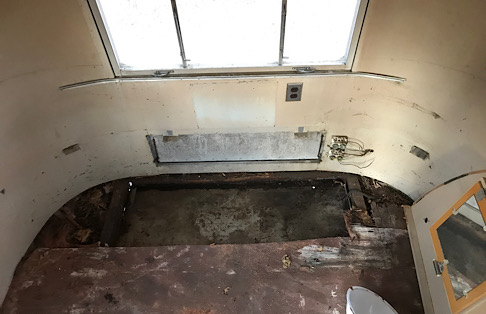
Originally this 1954 Safari did not have air conditioning. It also had what was essentially a hole in the floor for poop to drop through. So air conditioning, plumbing, and hot water are all modern conveniences that needed to be added. But I really don’t like the look of modern RV air conditioners that are mounted on the roof, especially for an older Airstream like this. This is a common challenge for vintage Airstream owners. I took part of the old closet to install a portable air conditioner that is vented through the wall using a round stainless steel access port and a large stainless steel clamshell (from West Marine). The port allows me to close it up during travel and when it is parked for storage. This keeps the clean lines on the top. Also, modern RV air conditioners are not very reliable and can cost around $1200 and require the installer…me…to get up on the roof with a 100 lb piece of equipment. This way if it craps out on us, all we need to do is stop by most big box stores and pick up a $300 portable air conditioner to replace it if needed.


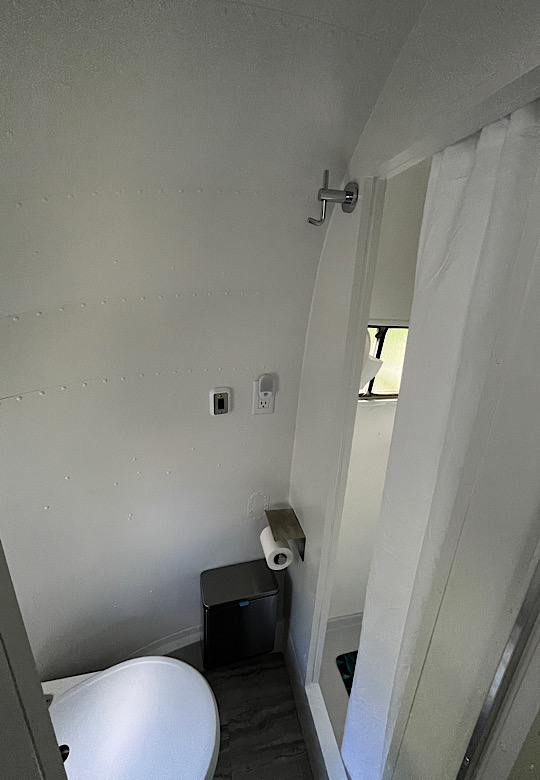
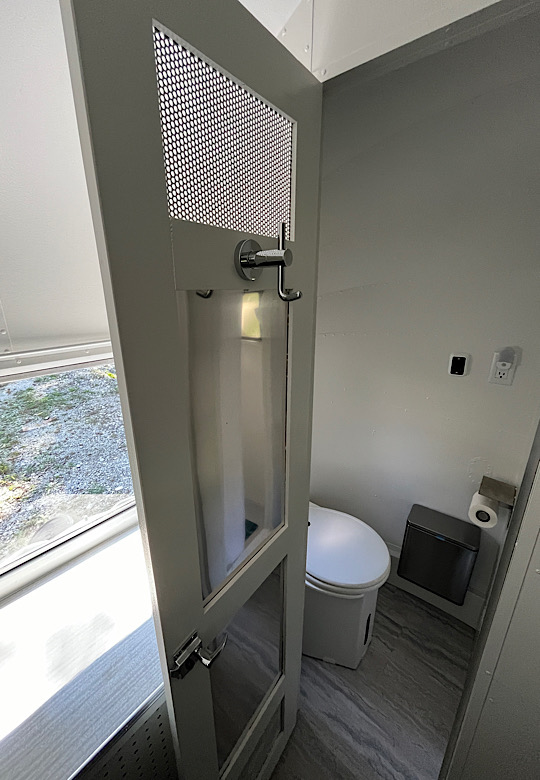
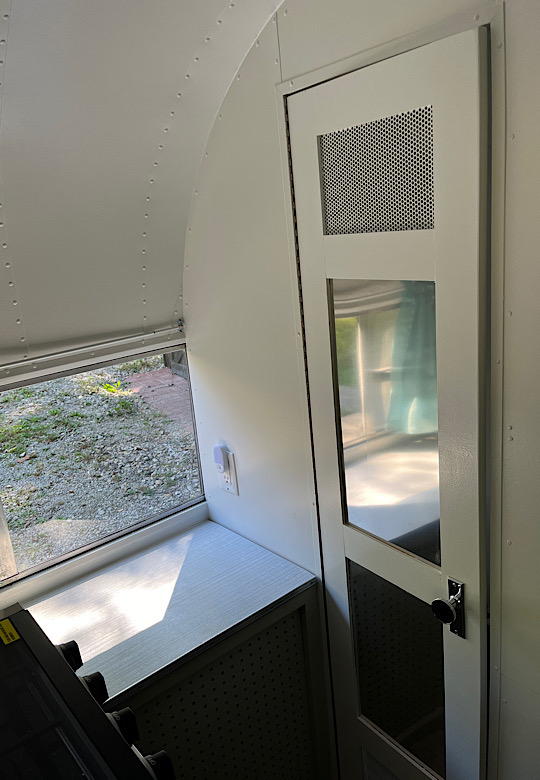
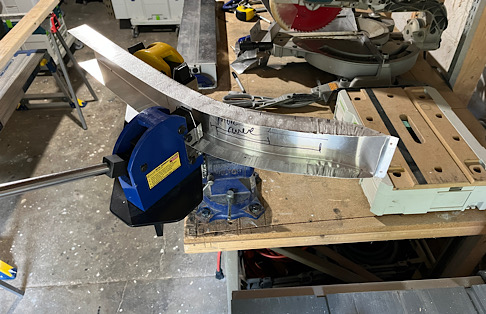
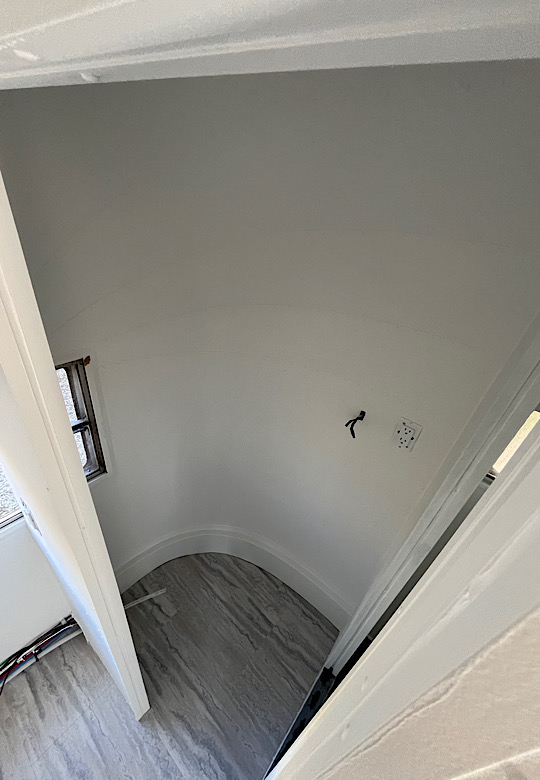
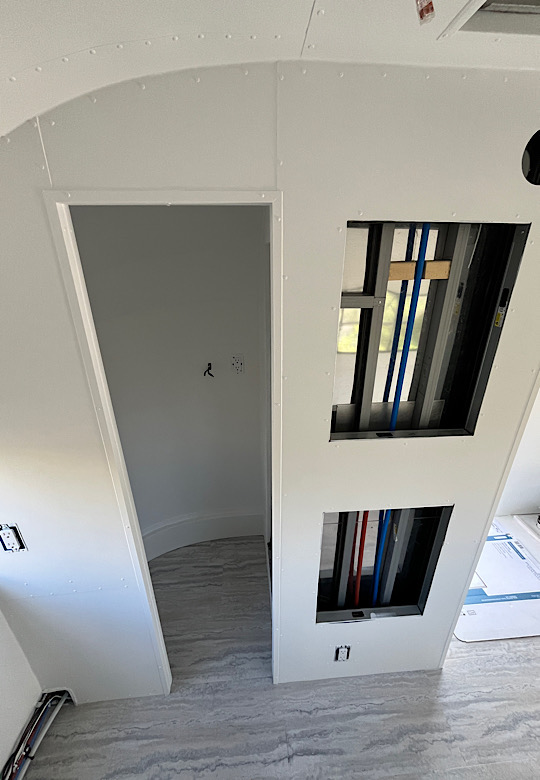
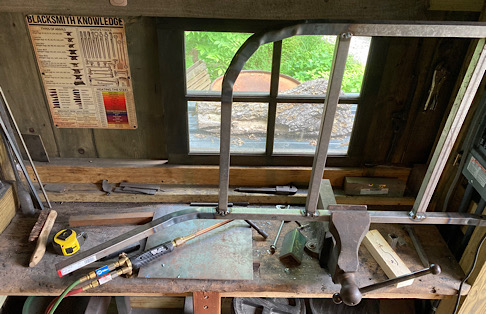
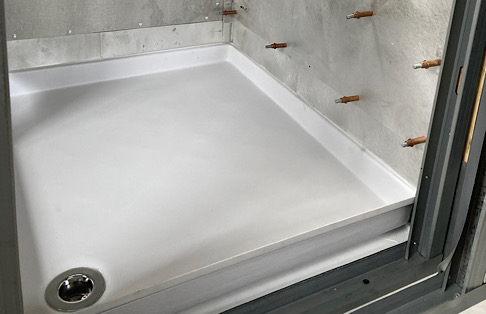
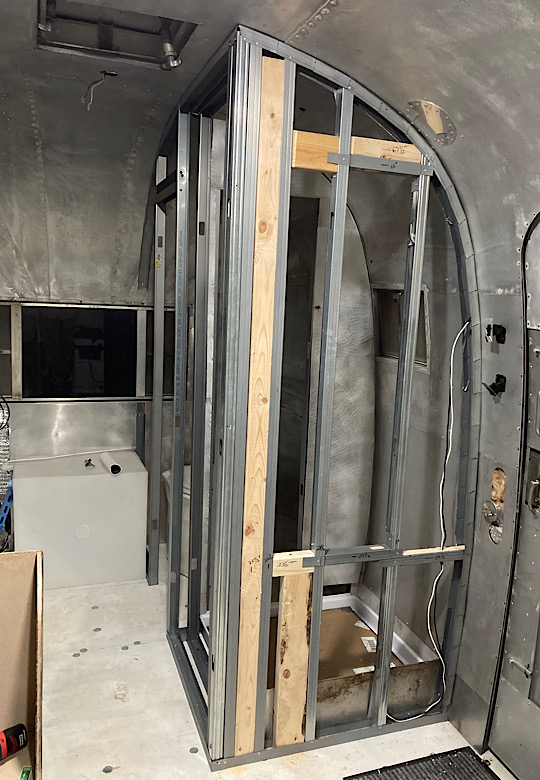
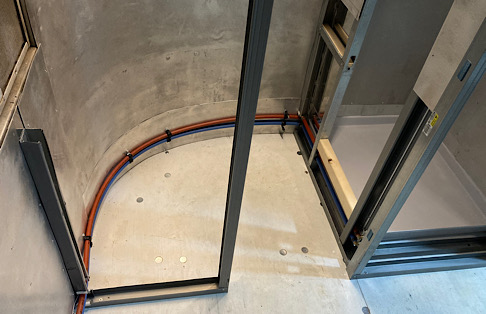
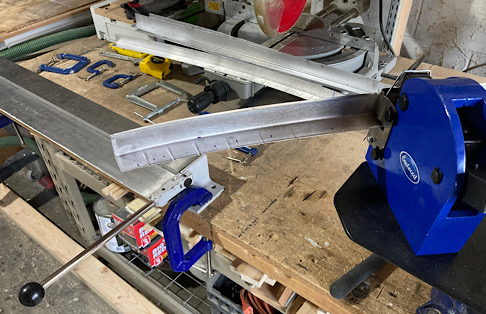
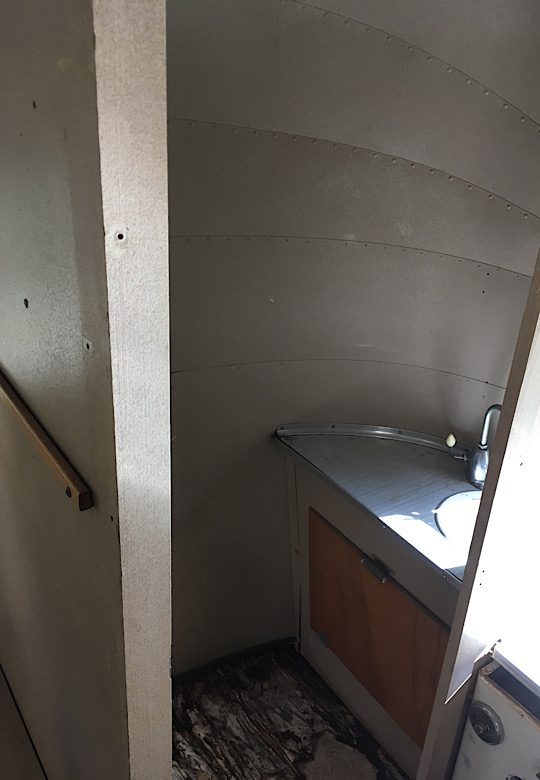
In April 2023 I started working on the bathroom. It will be a truly tiny bathroom, but large enough to take care of business, clean up after a hard day of hiking, or….well, that is about it, because it will be really small. To ensure the shower was actually waterproof, I had to make some custom corner trim pieces using the metal brake and the shrinker/stretcher, both of which have been especially useful in the renovation.


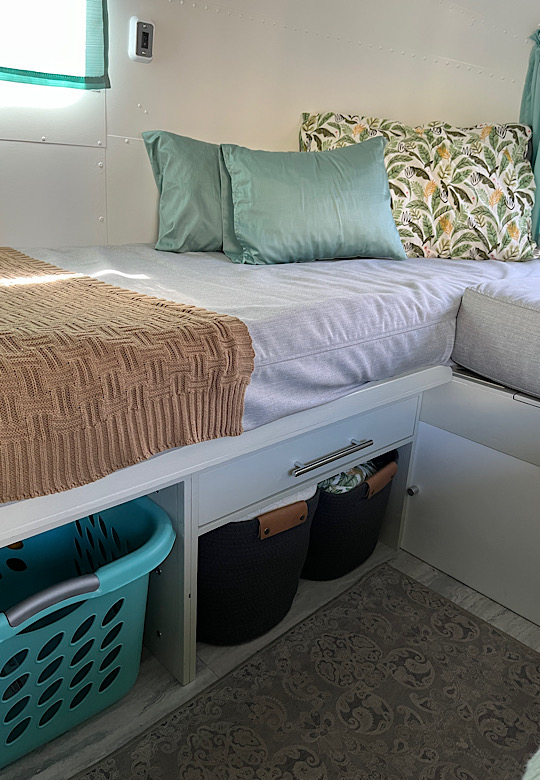
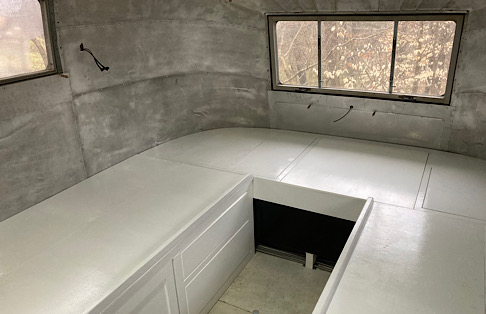
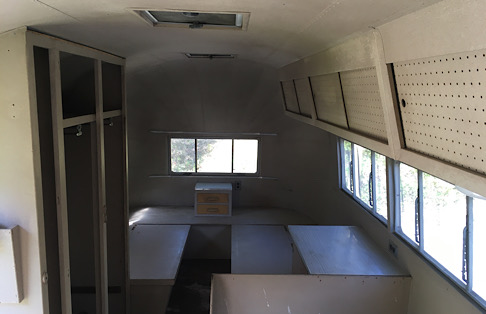
Now that most of the interior skins are in place and the wiring is mostly completed…mostly, I can turn to building and fitting the furniture. Even though I am going to rebuild all of the interior components, the old furniture, walls, and cabinets are great for mockups and sometimes even for parts. What I found is that there is a big trade off between convenience and weight. The original bed platforms operated like a trunk, but you had to move the mattress to access that storage and they were very light. The new ones have lots of great drawers for storage, but are heavy. So it depends on your ultimate goal. With these being modular, I can always swap them out for a lightweight version. Eventually all of this will have to be removed for painting, but seeing how is is still early March 2023, it is a bit risky to tackle the interior paint job. May is a better target for that. Or…I can just go with the brushed aluminum look and I would be done!

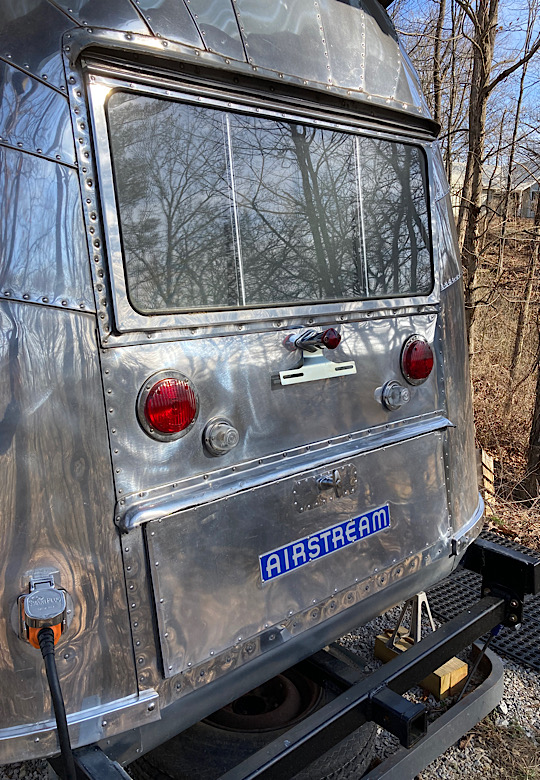
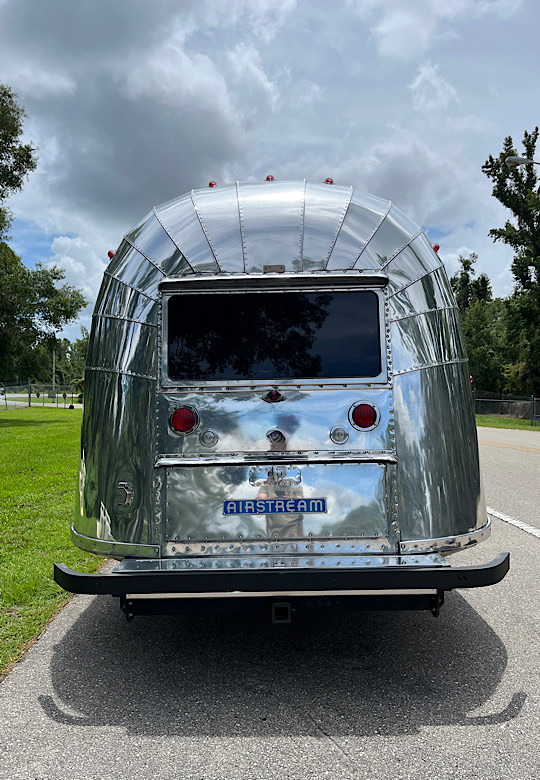
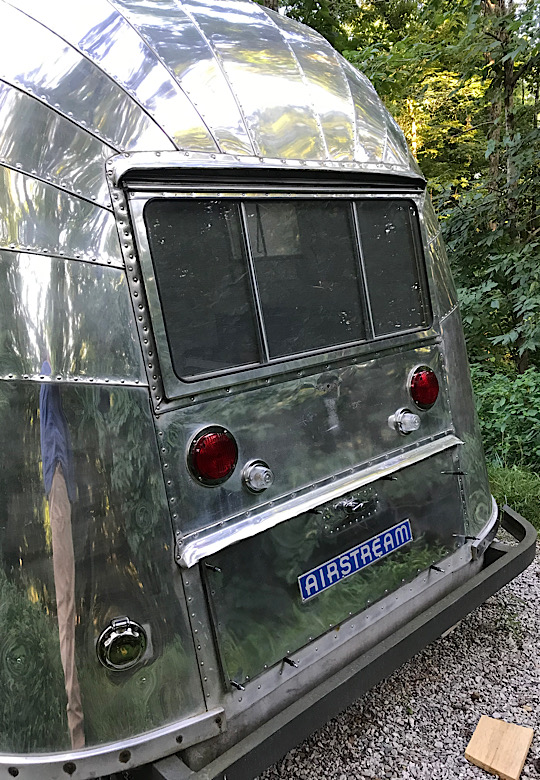
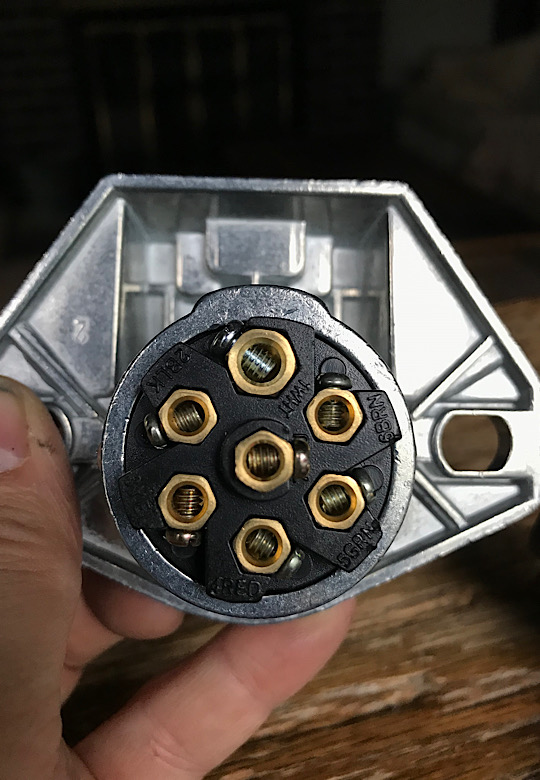
I finally got the remaining lights and new license plate bracket installed in February 2023, along with installing the trunk which is dust and waterproof. The original design was just an enclosed space between the bed which allowed dust from traveling and any water that might make its way into the rear hatch to enter the Airstream, ultimately causing the floor to rot, allowing whatever was stored there to form a bread crumb-like trail along the road between your house and camping location…not good. This is now sealed and separate from the inside of the Airstream, making it a perfect place to store wet and muddy items. I also upgraded the 30 amp plug to a SmartPlug, primarily for safety reasons.
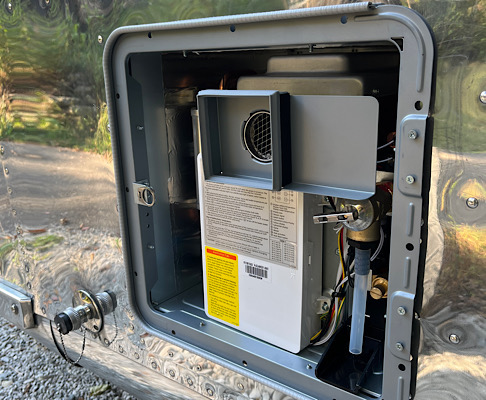
The next big project for the first of October was to install the PrecisionTemp tankless water heater from Vintage Trailer Supply. This is another one of those nerve racking operations…cutting a big freaking hole in the side of the Airstream. I chose this particular water heater because it would provide unlimited hot water….well it will heat up the 46 gallons of water that is onboard. The other major reason is that it can be purchased with an aluminum cover that can be polished up and made all nice and shiny…which is important for and Airstream.

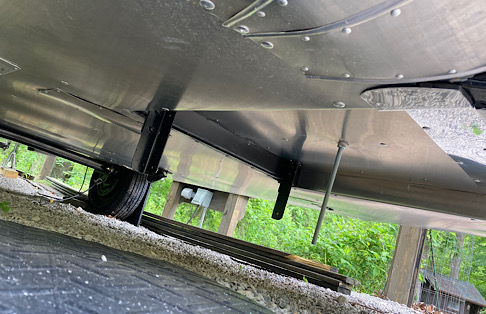
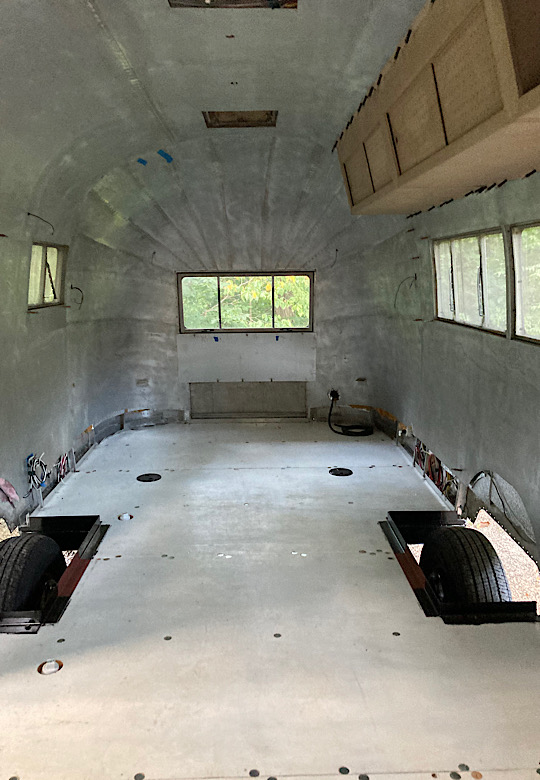
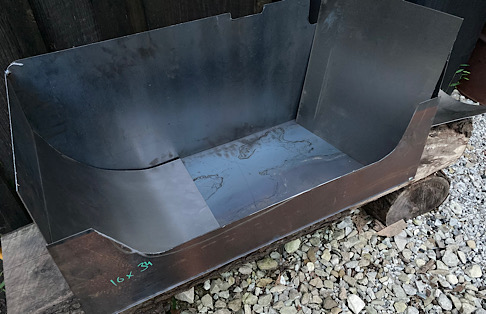
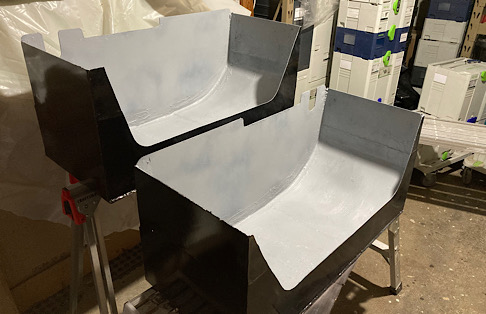
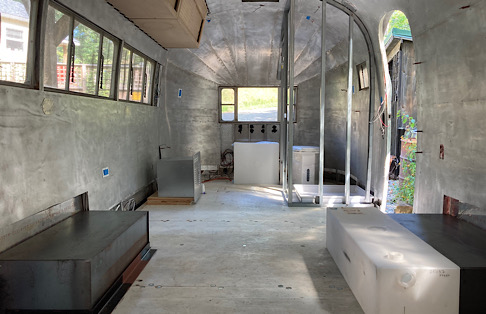
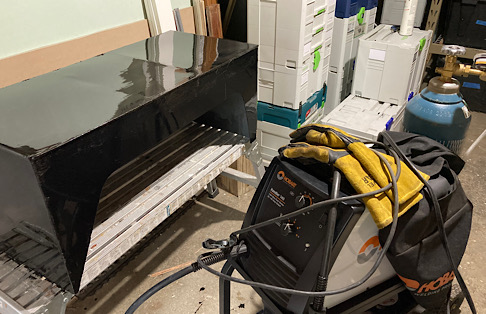
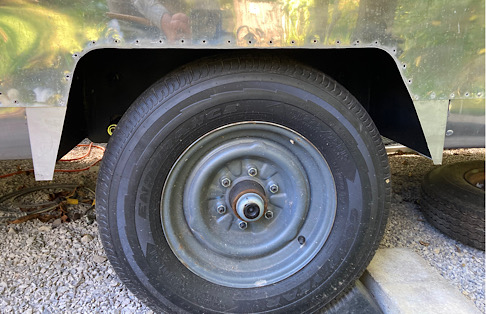
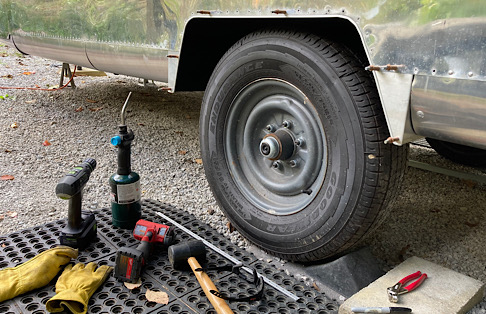
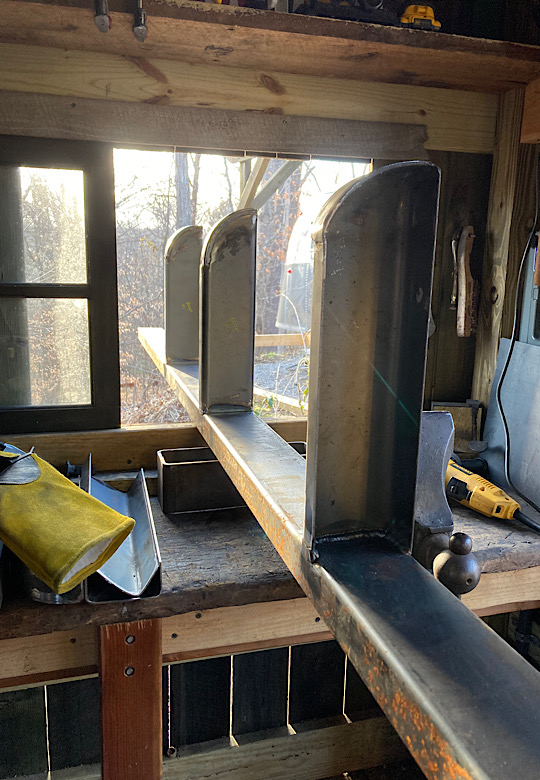
I fabricated new wheel wells from 14 ga steel with a bit different profile than the original ones. The original wells left the bottom of the outriggers and the bellypan exposed to whatever the tire picked up…water; snow; salt; grit; small, flattened animals; etc.. This caused the outriggers to rust faster and the bellypan to drop down, allowing a whole host of rodents…including live, nut hoarding rodents…easy access to the old bellypan. This new design should protect the rest of the Airstream better, including protecting it better from a tire blowout. It will also be able to carry some weight on the inside of the trailer, such as the 1954 fridge, the portable air conditioner, and our dog.
Now that the chassis and shell are back where they belong…sitting atop a new Dexter 5,000 lb. axle ordered from Colin Hyde Trailer Restorations….at the end of August 2022, I have to drill and re-rivet all of the holes around the perimeter….all 300 of them. Hey…didn’t they make a movie about the 300? Oh yeah…that was about putting holes in people and drilling them with spears. Not quite the same. Definitely less gore in this operation unless you include when I cut my finger on a piece of aluminum. Don’t scoff. It was not pretty….and it hurt. No…really it did.


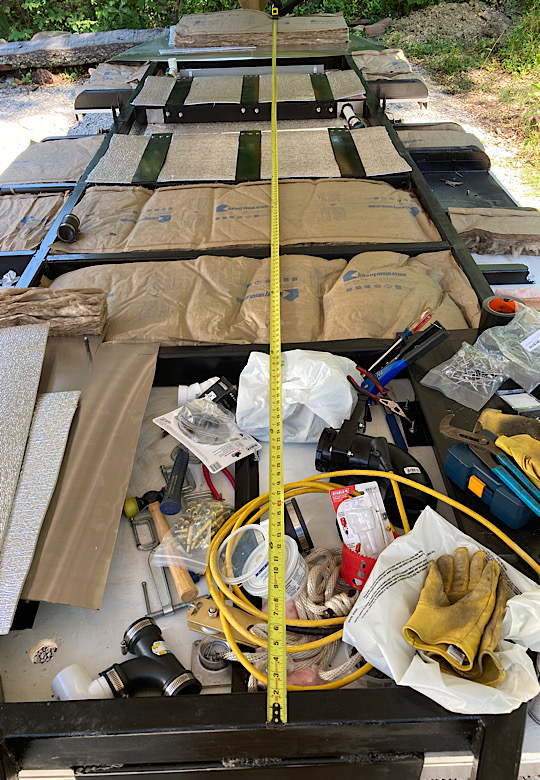
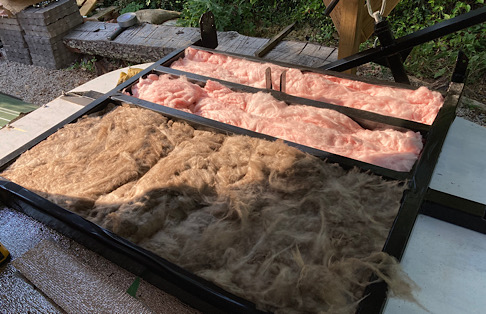
In July 2022, I added insulation, plumbing, water and gray tanks, and any underbody venting. I chose to go with a sandwich of reflective foam core insulation with fiberglass batts in between. Hopefully, the lower layer of foam core insulation will allow any water that gets inside the belly pan to stay away from the fiberglass batts. I also sealed up any unused frame pass through holes with steel, and also put a plate tighter around the plumbing access points so that if….what I really mean is when….mice get into the belly pan, hopefully they will be relegated to one section of the frame rather than having free reign of the whole thing.


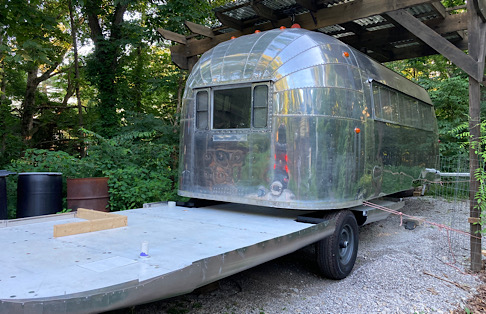
The next step is adding the floor, the plumbing, and belly pan…and the best way of doing that is inverted. I did try ‘windgardium leviosium’, but in the end resorted to pulleys, a couple of come-a-longs, and some wood posts. I also ordered some .025 5052 for the belly pan from Airparts. Be sure you either have a nice long area for it to unroll, or put a rope around the coil and let it out nice and easy. Of course here at Blacksmith Cottage, I am much more of the cut it and let it fly kinda guy. And just as soon as the cut on my forehead stops bleeding, I will get back to work.

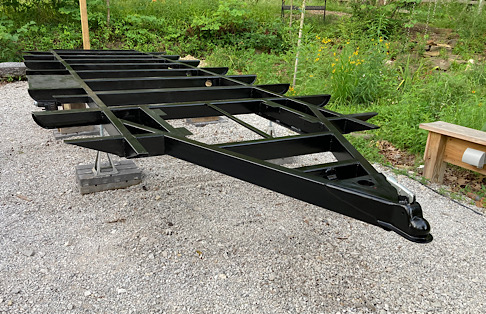
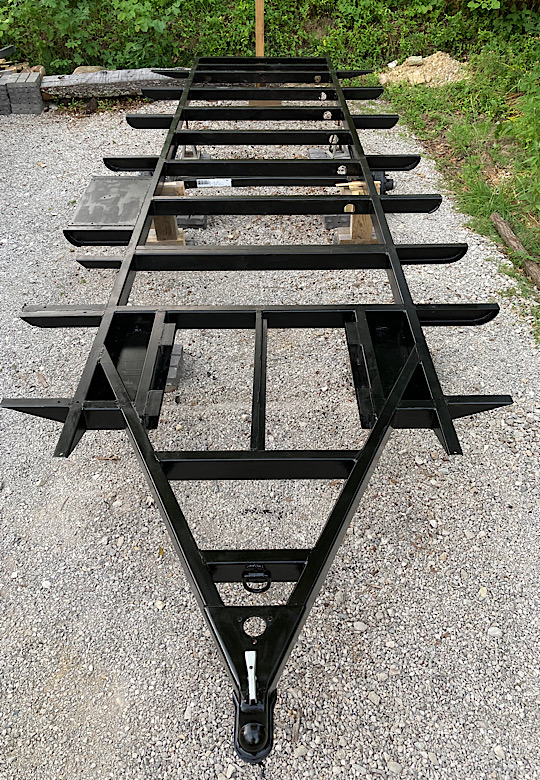
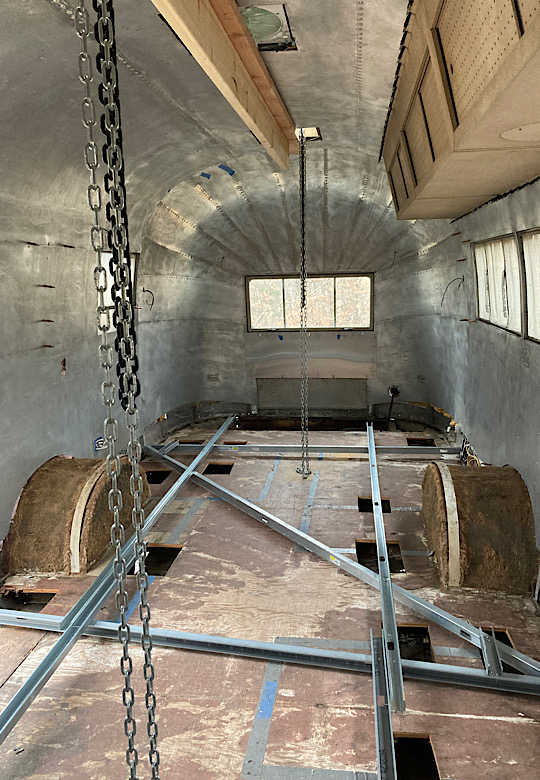
On to replacing the chassis. We could have chosen to repair the chassis but that would have been cheaper and easier…and that is not how we roll here at Blacksmith Cottage. The old frame was 0.090 thick rectangular tube. The new one is 0.120 thick 2 x 4 rectangular tube from MetalsSupermarket so it will be stronger. The A-frame tongue will also have a better geometry than the old one. I am really wishing I would have paid more attention in geometry class. So I spent the Winter of 2022 cutting and creating parts so they could be assembled this coming Spring.


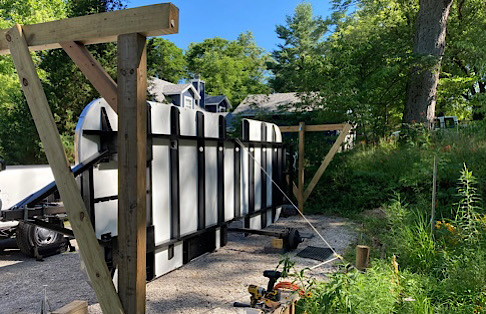
In December 2021, it was time to separate the shell from the chassis. Separating the shell from the chassis is one of time honored…and nerve-racking aspects of vintage Airstream ownership. If you have never done this…you really need to. No…really you do…because you probably have some issues with your old Airstream that need to be fixed and they are pretty tough to fix without pulling that thing apart. Plus it makes for some really good looks when people walk by and see a floating Airstream.
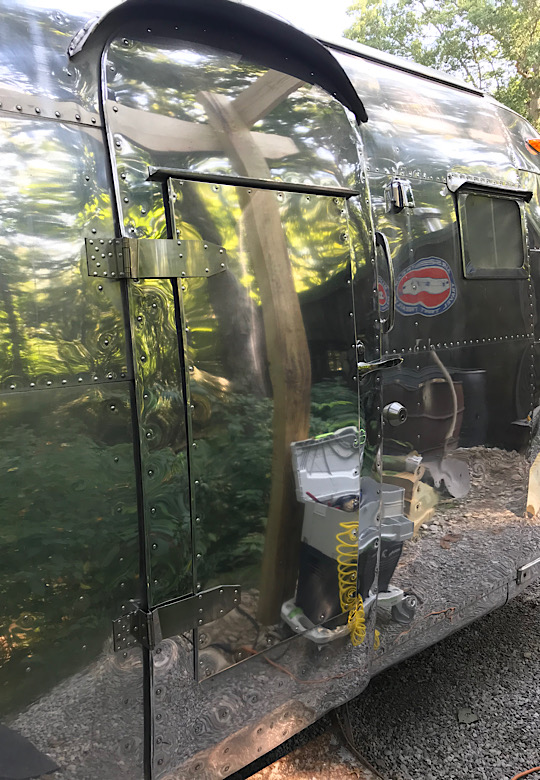
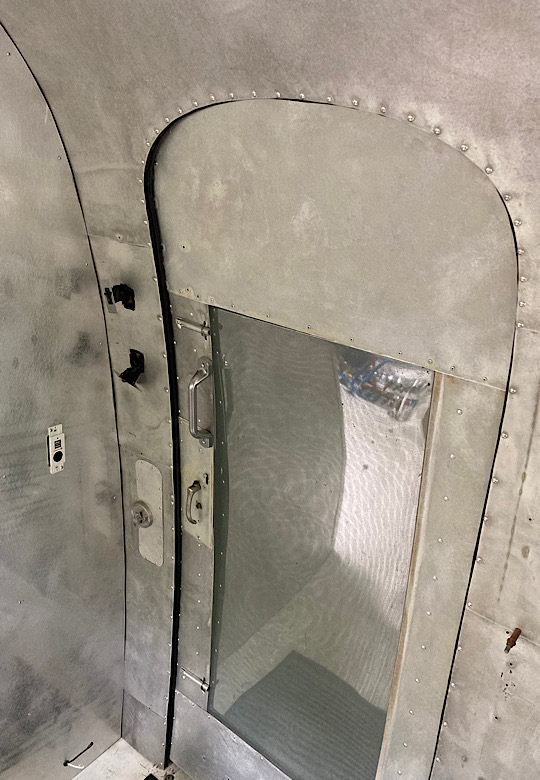
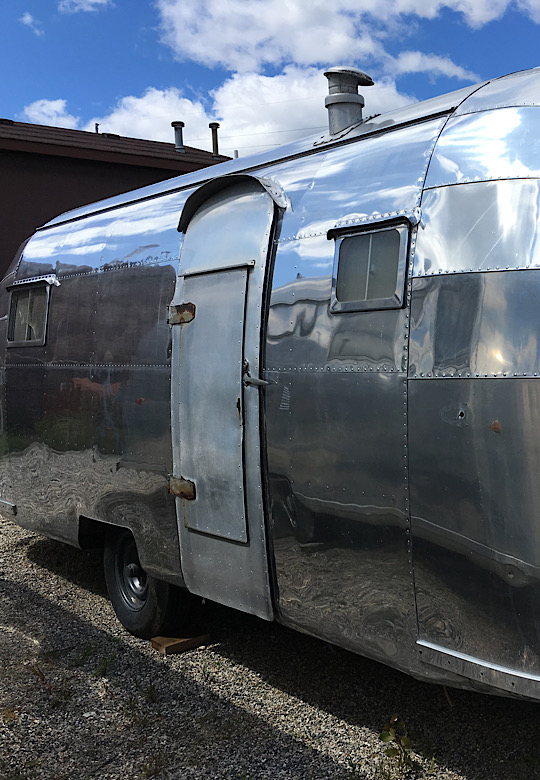
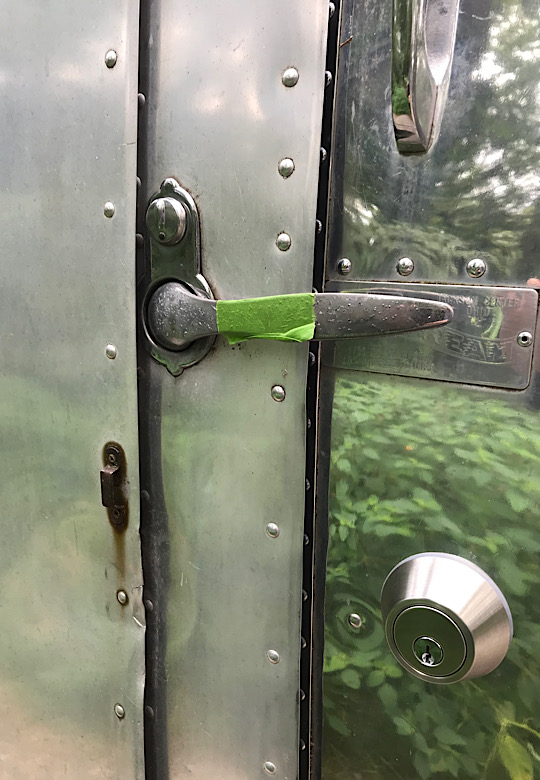
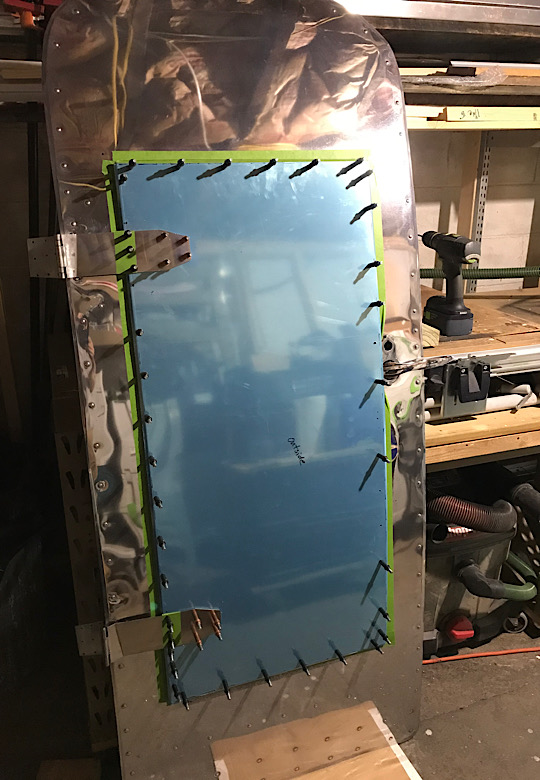
I needed to replace the door because the hinges were mild steel instead of the stainless steel hinges used in later years. So the hinges had rusted through the door and had started to damage the skin of the Airstream. In August 2021, I found a pair of stainless steel hinges from HighSkyRVParts, a new shiny handle and gaskets from Vintage Trailer Supply, new aluminum skins from Airparts Inc., and a local locksmith repinned the lock. I looked for hinges for about 2 years before finding them. Now the door is as good as new. Well, as good as you could expect from a 70 year old trailer…but it is shiny…real, real shiny.

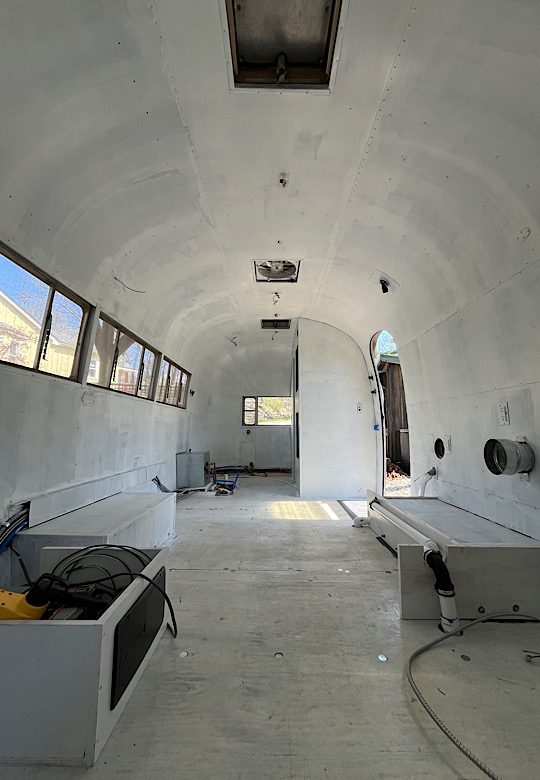
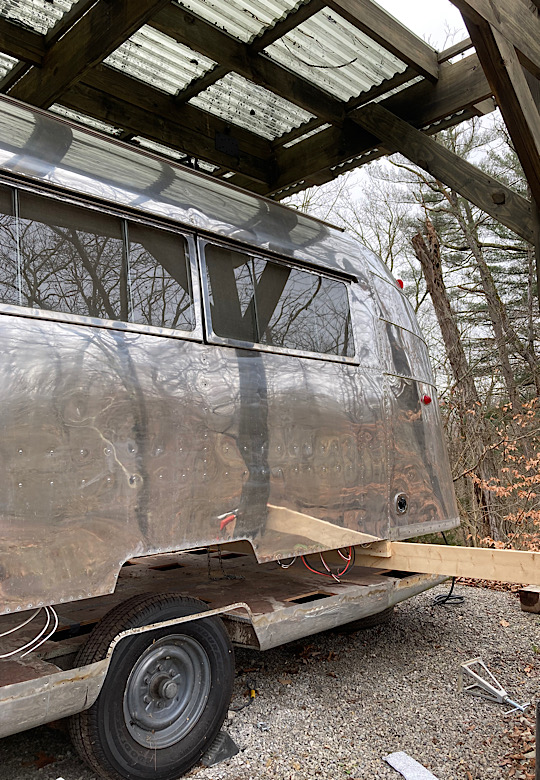
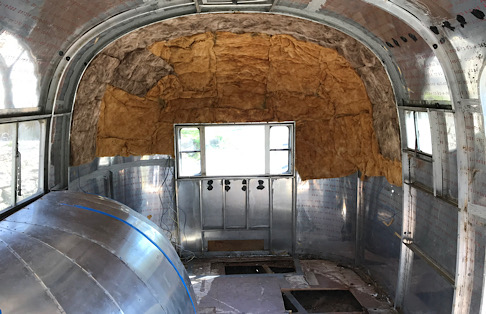
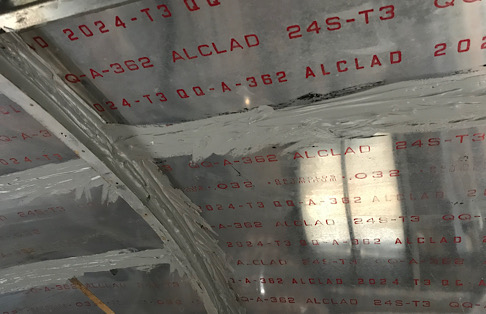
With the wiring done, prewiring and preplumbing for the rooftop AC completed, patch work on the roof completed, new sealant sealed, and the insulation installed, I can finally get the skins out of storage and reinstall them in July 2020. They have been stripped of old paint and sanded to make them ready for new paint. Oh crap! I forgot to replace the floor and chassis! Not to worry. If you look close, I cut 6” around the perimeter of the skins so that I can still access the bolts to the floor and replace the chassis. I felt is would probably be a bit stronger for lifting with the skins installed. Plus storing them elsewhere was a real pain in the….garage.
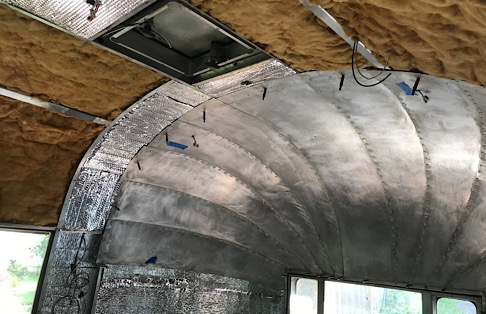


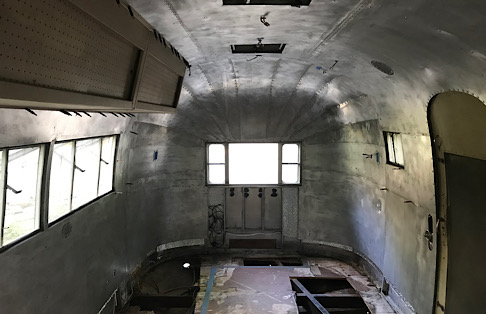
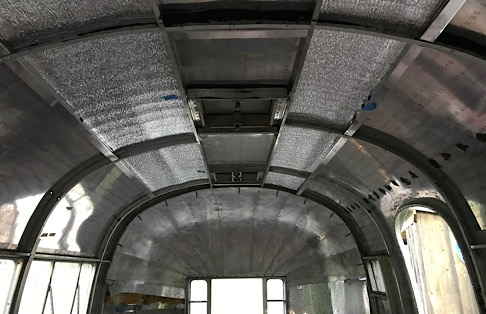
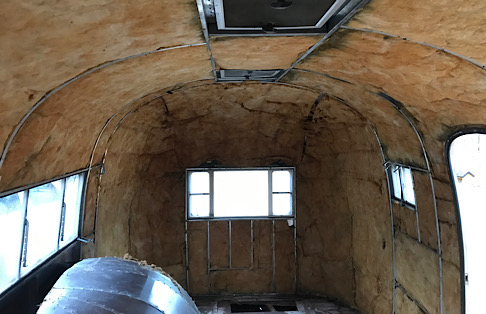
The insulation was replaced with a sandwich of reflective foam core insulation on the outside, fiberglass batts, and another layer of reflective foam core insulation in April 2020. In a few places that were flat, I used an outside layer of reflective foam core insulation and foam board. One of the great debates of Airstream renovation is what is the best insulation. For such a small space, it probably does not matter. What really matters is removing the stinky mouse pee infested old insulation…if you don’t want a stinky mouse pee smelling Airstream when you are done.


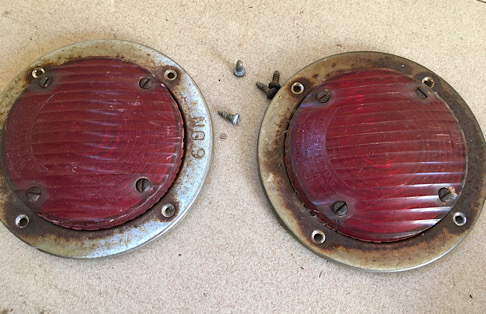
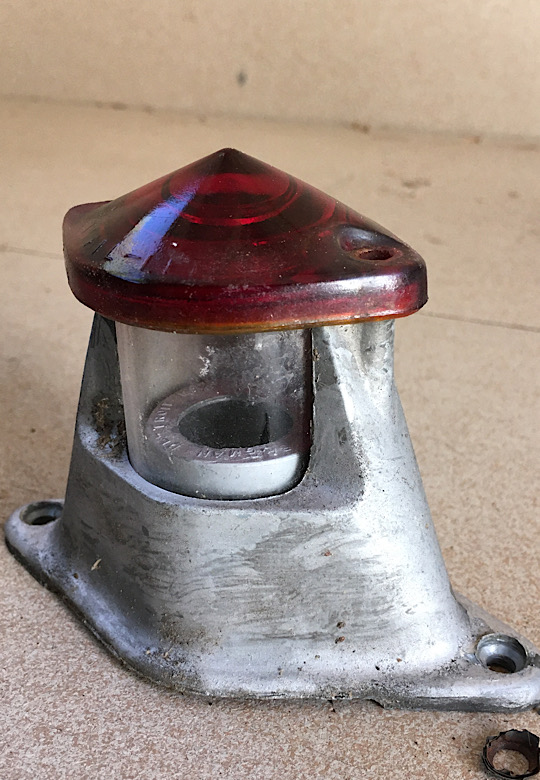
The running and brake lights were in a sad state. I added new front and rear running lights, brake lights, and reverse lights to the Safari from the good folks at Vintage Trailer Supply. Now, we can be seen driving down the road at night….which is a good thing. Unless you are doing something illegal, then you would not want that visibility…but then you probably not be towing your Airstream with you either.


New wiring is essential for a new old Airstream. The old wiring can be chewed up by mice, it is not grounded (well, it can be grounded to the body…but not intentionally), and they only needed one outlet back in the day. The new Airstream will need prewiring for solar and rooftop air conditioning, wiring for a 12 volt DC and 120 volt AC, and new interior and exterior lights. Holy crap…have you seen the price of copper wire! Maybe we really only need a single outlet…


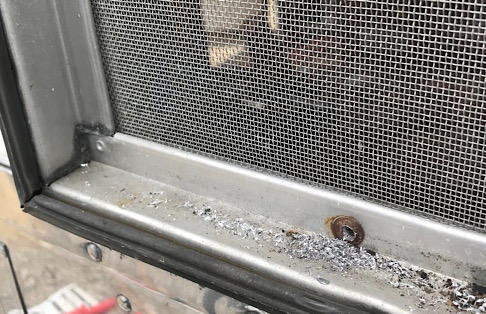
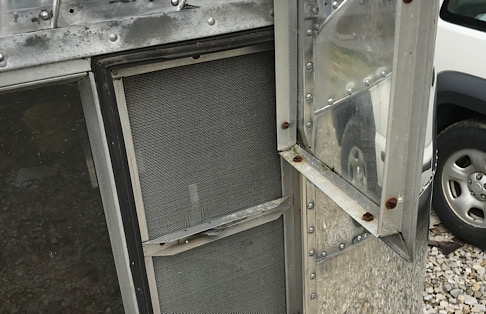
Time to fix the windows. The seals on the windows dry out over time and need to be replaced. Luckily, the parts are difficult to find and often are sold out…wait, that is not a good thing. Vintage Trailer Supply and Vintage Trailer Gaskets (yes that is a real shop) remake these gaskets and such just for folks like me…people who want to fix a 70 year old trailers….yes…crazy people…that is what you are thinking…crazy people.


Making sure an Airstream does not leak is an important step in the renovation. In December 2019 we scraped old black sealant that Airstream used, which had long hardened and lost it’s water proofing ability and replaced it with new Vulkem…lots and lots of Vulkem. I sealed every rivet and seam I could see. Possibly a bit of overkill, but I don’t plan on opening these walls up again. I will also seal up the seams from the outside as well, just to make sure.
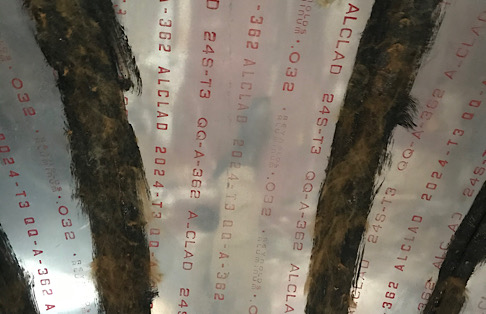


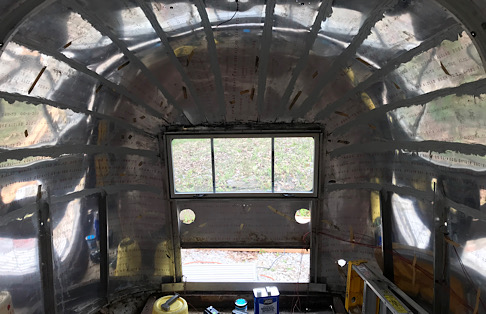

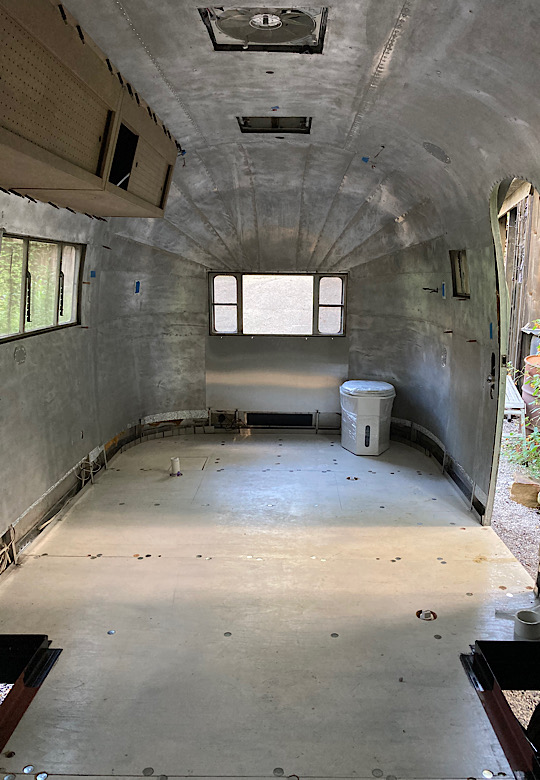
Oh yeah…not only do you need to take the stuff out of the Airstream, you also have to take out all of those interior panels and store them. You also have to evict the mice and remove all of the insulation in the walls. Poor mice…they had such a nice home…and they won’t be able to move back in for years…wait…what?!? Well, at least their great grand mice will have a good home.
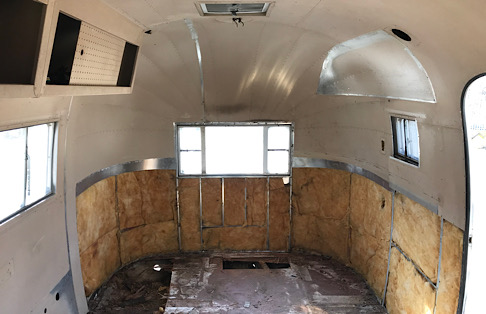

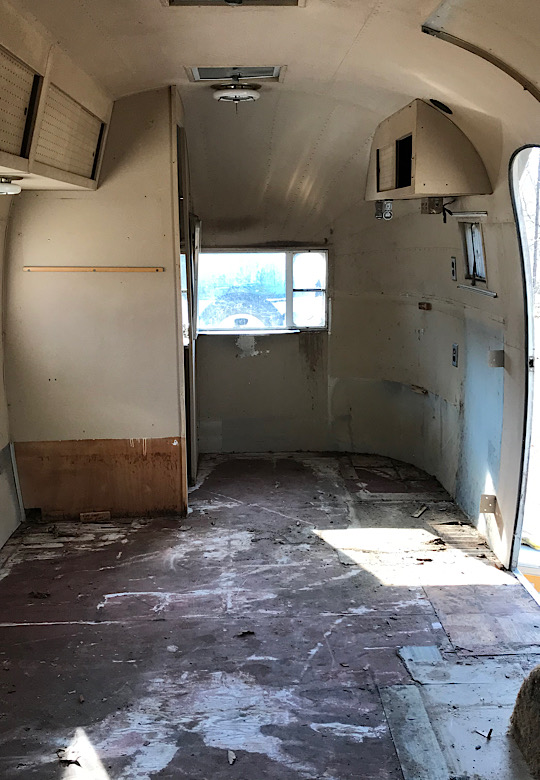
Step three…remove all of that stuff that was inside and store it somewhere out of the way…because you will not need it for a long…long…long time. Just how long? Two years and counting. Hmmmm….maybe this was not such a good idea. Well, everyone needs a big hole to throw money down into….right?


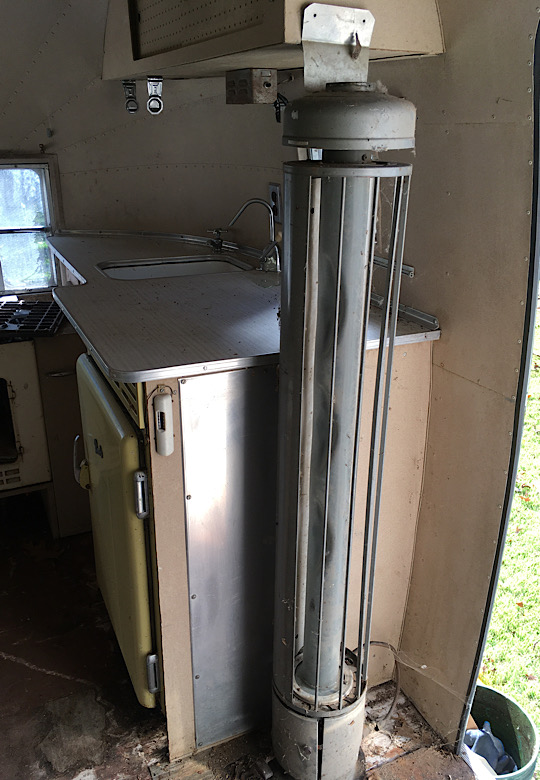
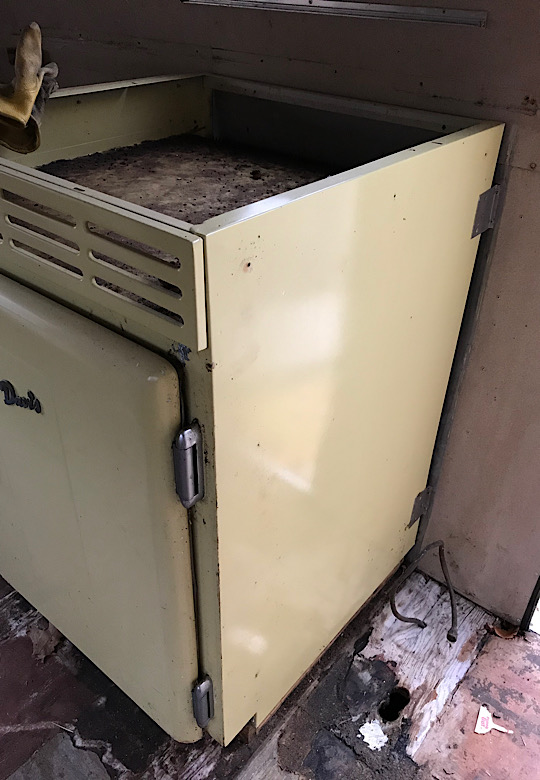
Many of the components will be able to be restored, such as the ice-electric refrigerator which will be converted to a 12 volt DC / 120 volt AC system. Others, such as the oven and the bathroom were not able to be saved and will be replaced with modern components. Resorting a toilet is a crappy job that nobody really wants to tackle, so we are going to replace that with a composting toilet.
The interior components will be saved, restored, and/or used as patterns for replacement where appropriate. Or, burned as fuel in our forge. At the Cottage, we let nothing go to waste…not even goat waste…which is highly prized for the garden.


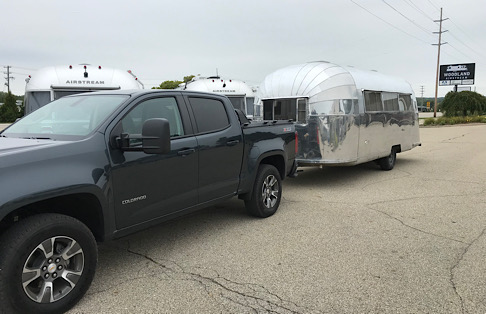
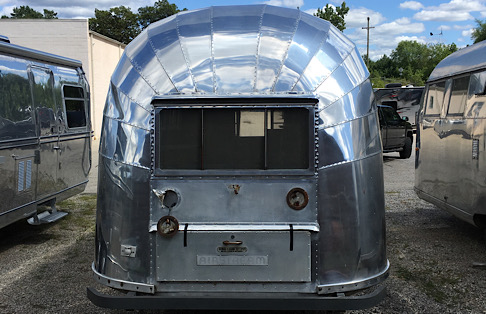
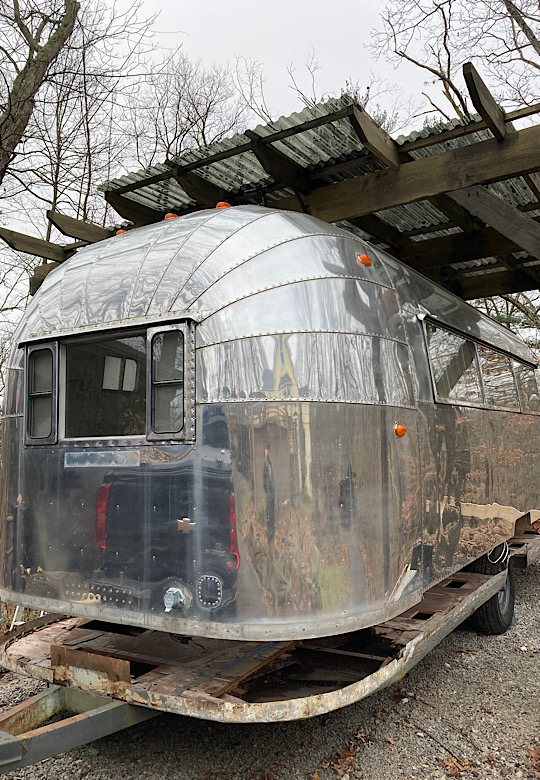
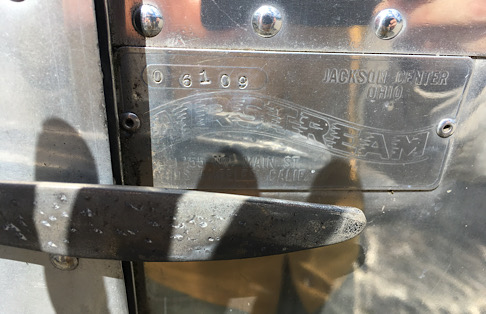
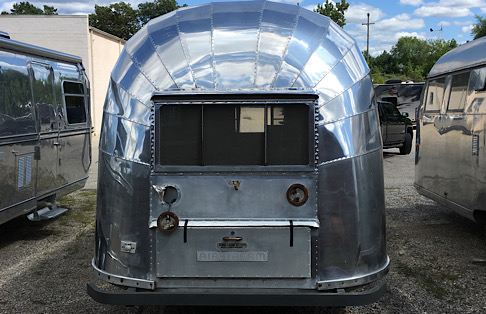
Step 1. Find an Airstream. Some times this is easy, most of the time not so much. In this case, Woodland Airstream in Grand Rapids, Michigan in August 2019 had pulled out a slew of old Airstreams out of the back to start selling them. I came to purchase a 1960 Overlander, but found this 54 Safari when I showed up. Someone had just brought it in for a consignment sale and it was not even on their website yet. So I came home with this gem from the mid-1950’s sporting 13 panels on the front and back. I just love them 13 panels….yeah baby! Ok….that sounded a bit creepy.